Your Cart is Empty


Mudenza Assembly & Installation Guide
G'day, welcome to the Rhythm & Timbre, Mudenza installation guide.
We are an Australian online business with a love for music, never ending music gadgets, instruments, and accessories. We try very hard to iterate, improve and grow our brand to as many fellow music lovers. Your experience truly matters to us, and we consistently read reviews and seek feedback.
We have compiled the below as a general installation guide, however we strongly recommend you consult a professional to ensure a secure mounting for your prized possessions.
⚠️ Please note that currently in one of our Mudenza production batches, we have had a rare issue with the inner and outer pieces sticking together. Please reach out to us via theContact Us page or socials and we will send a direct replacement.
Part 1: Unpack, Plan and Measure
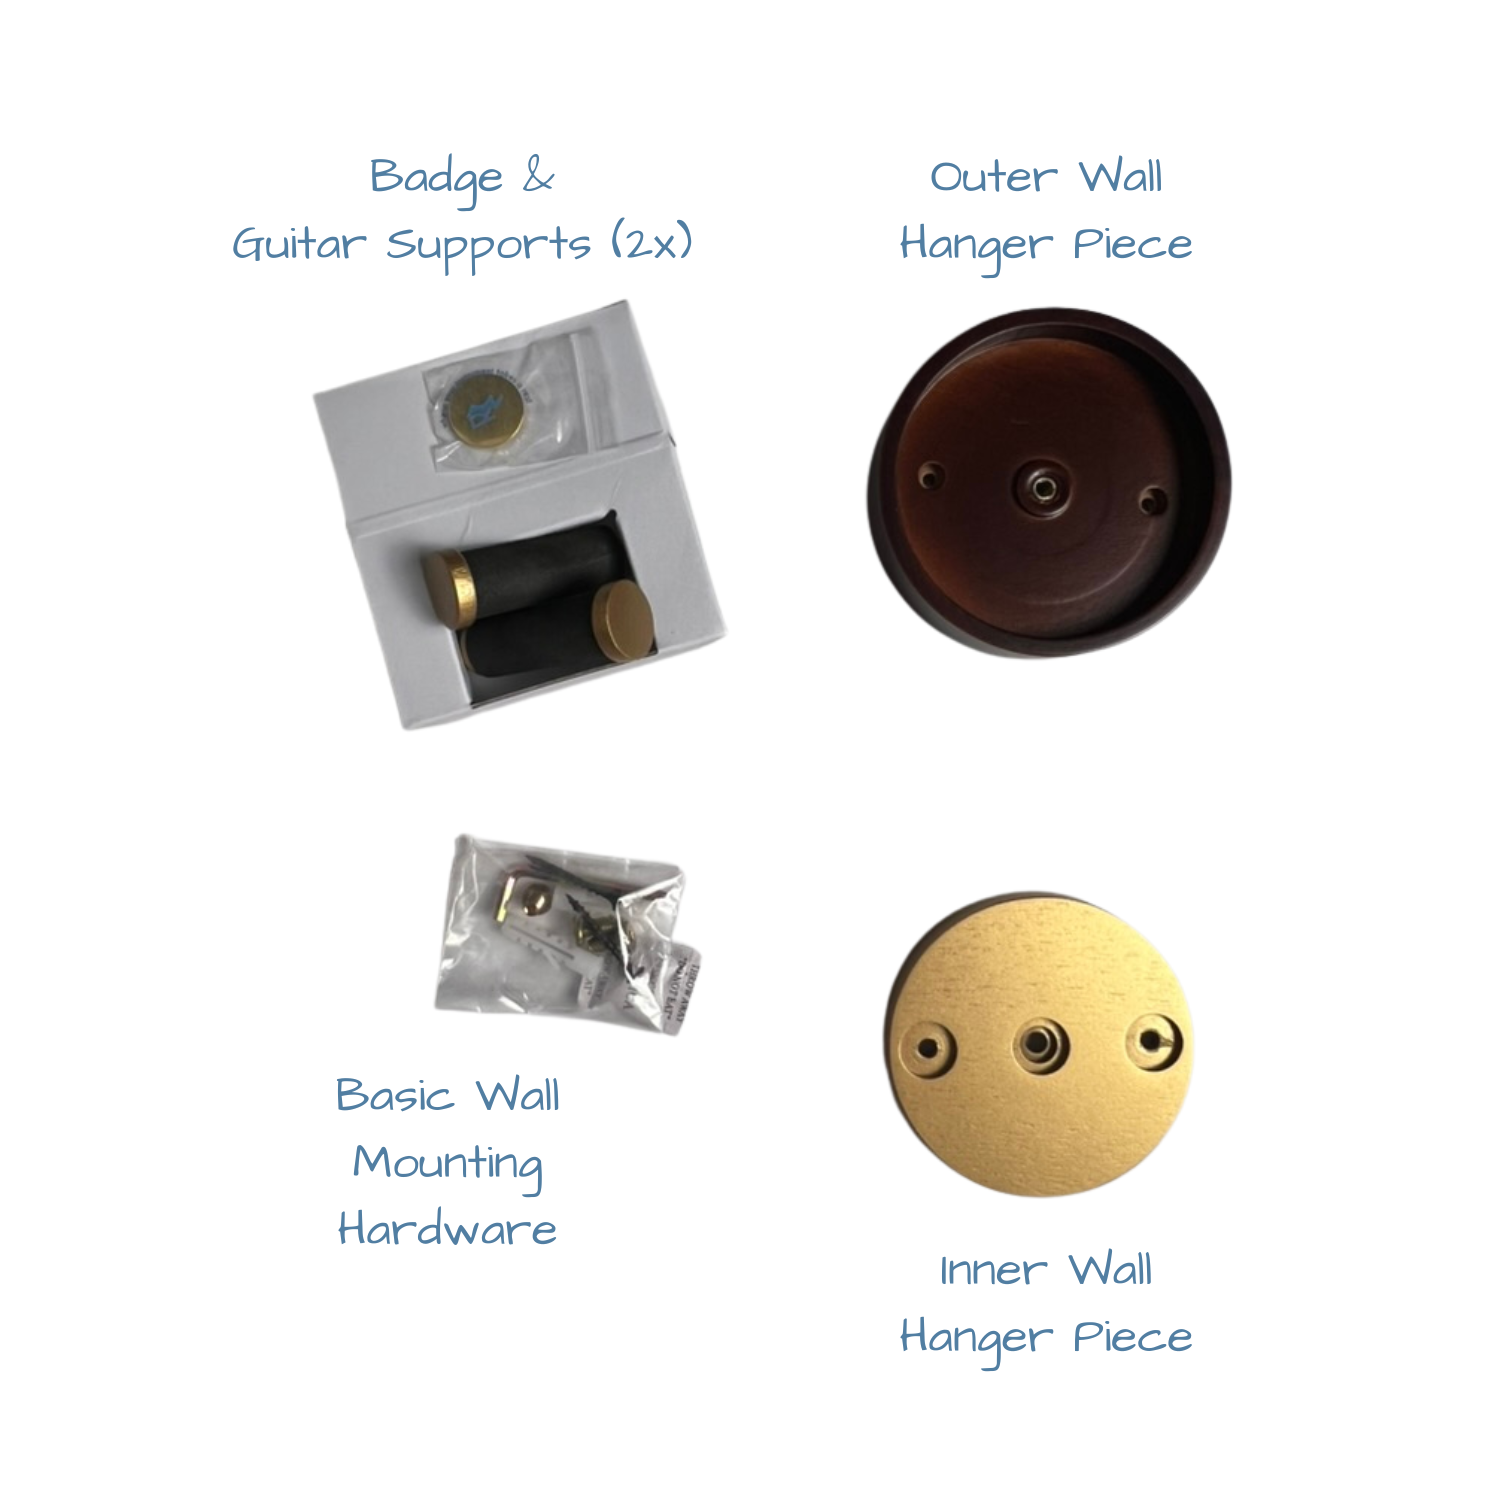

Step 1 - Unpack
📦 Take out the outer and inner wall hanger pieces, along with the mounting hardware and guitar supports.
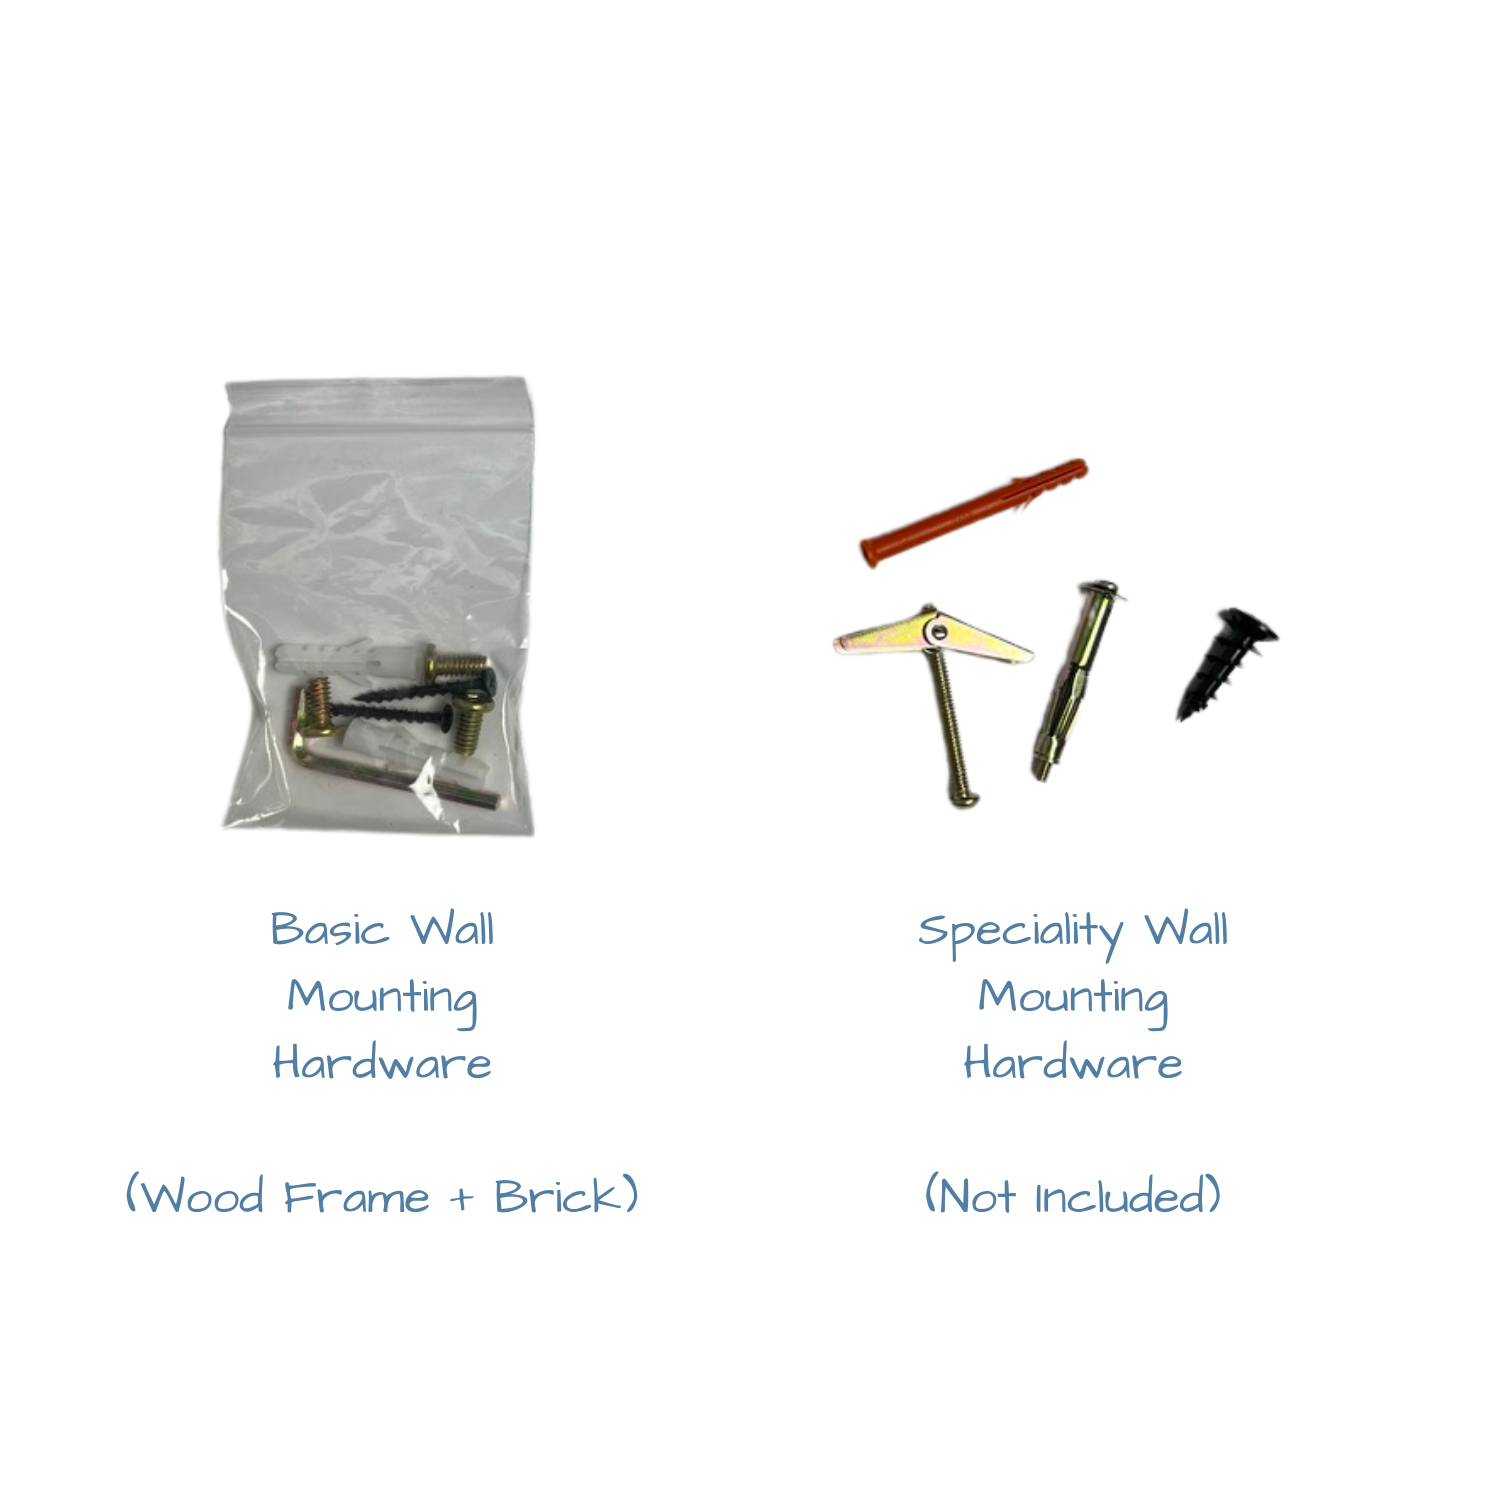

Step 2 - Confirming Hardware
Understanding your target mounting surface, confirm if the supplied basic mounting hardware works, or if specialised fixings are required.
⚠️ Please consult or use a professional.
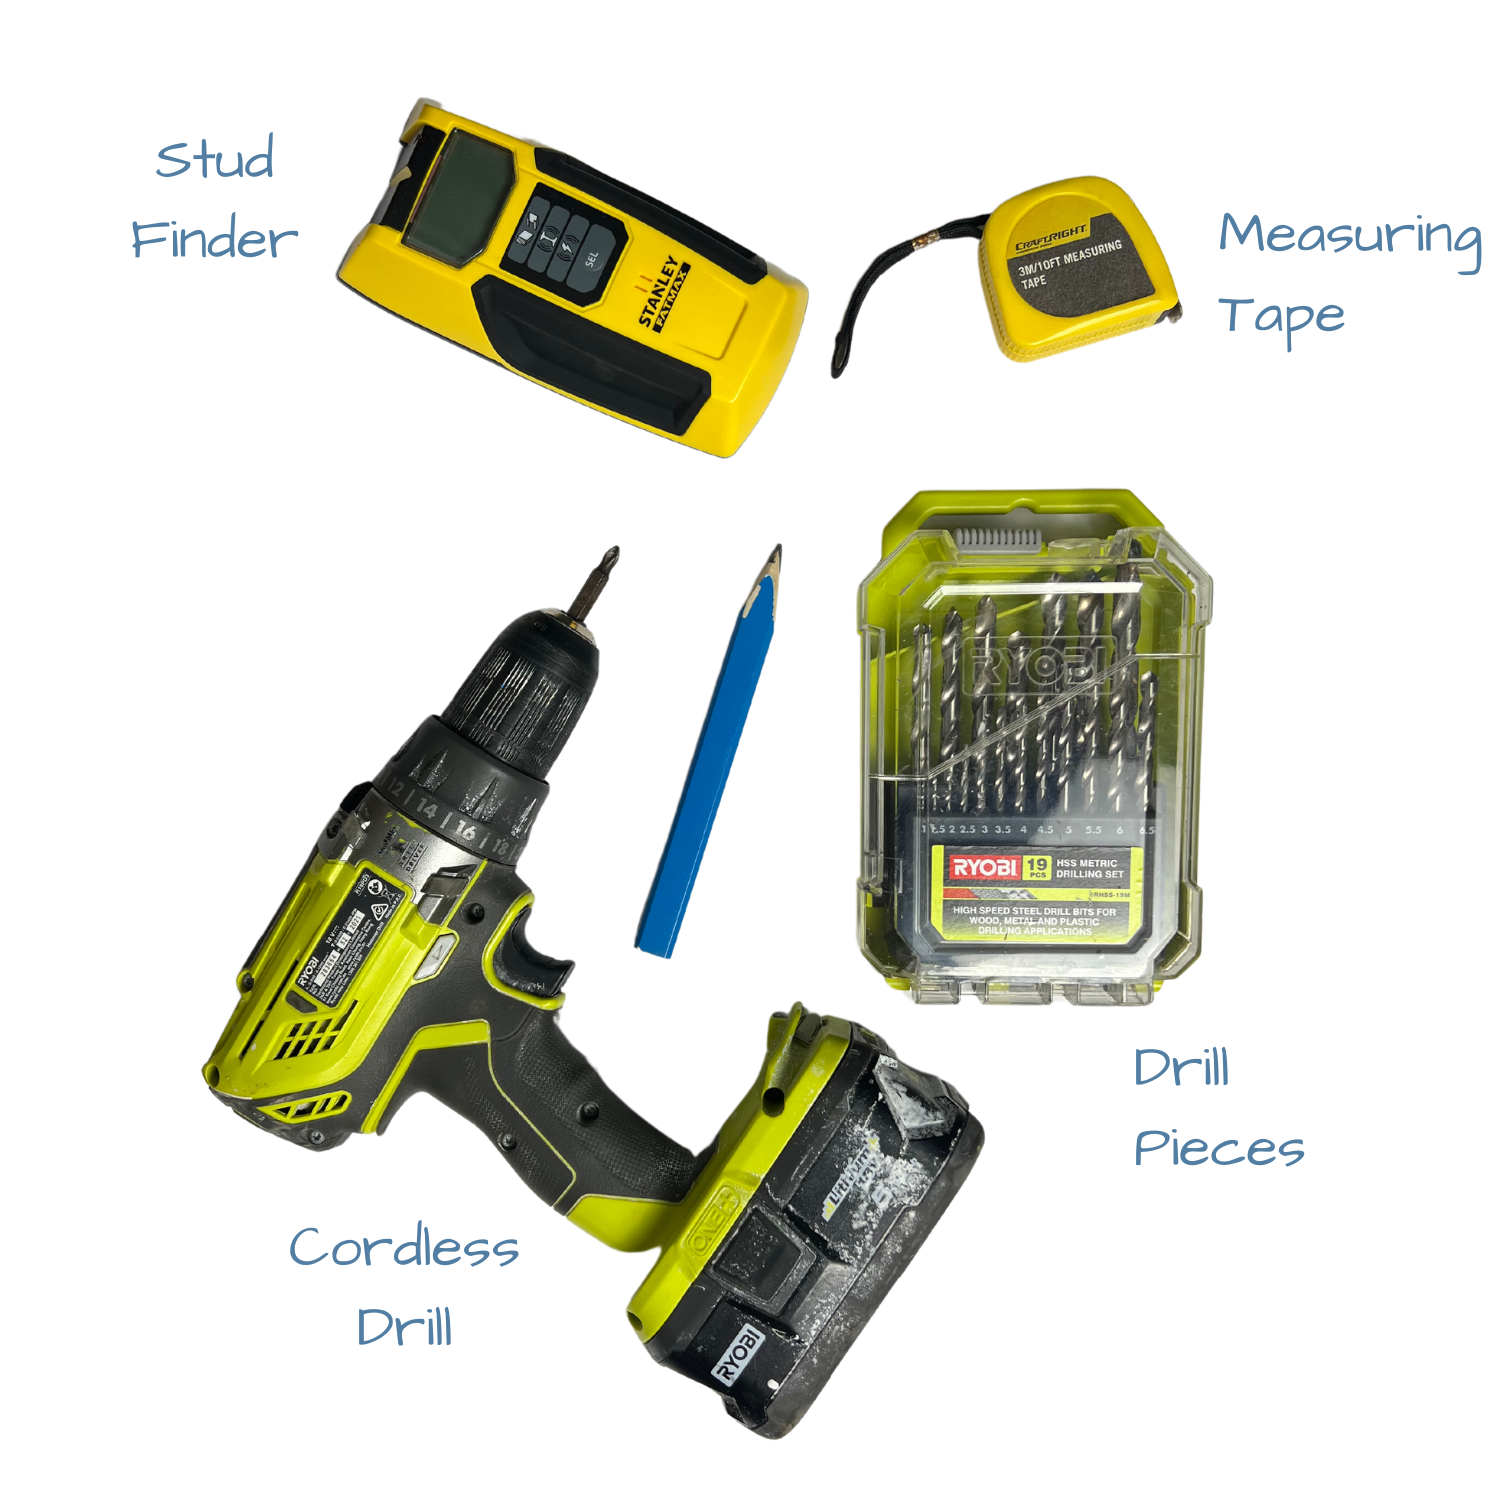

Step 3 - Reccomended Tools
🛠️ Depending on your scenario, different tools may be required. For a basic installation we recommend a stud funder, applicable drilling and measuring hardware.
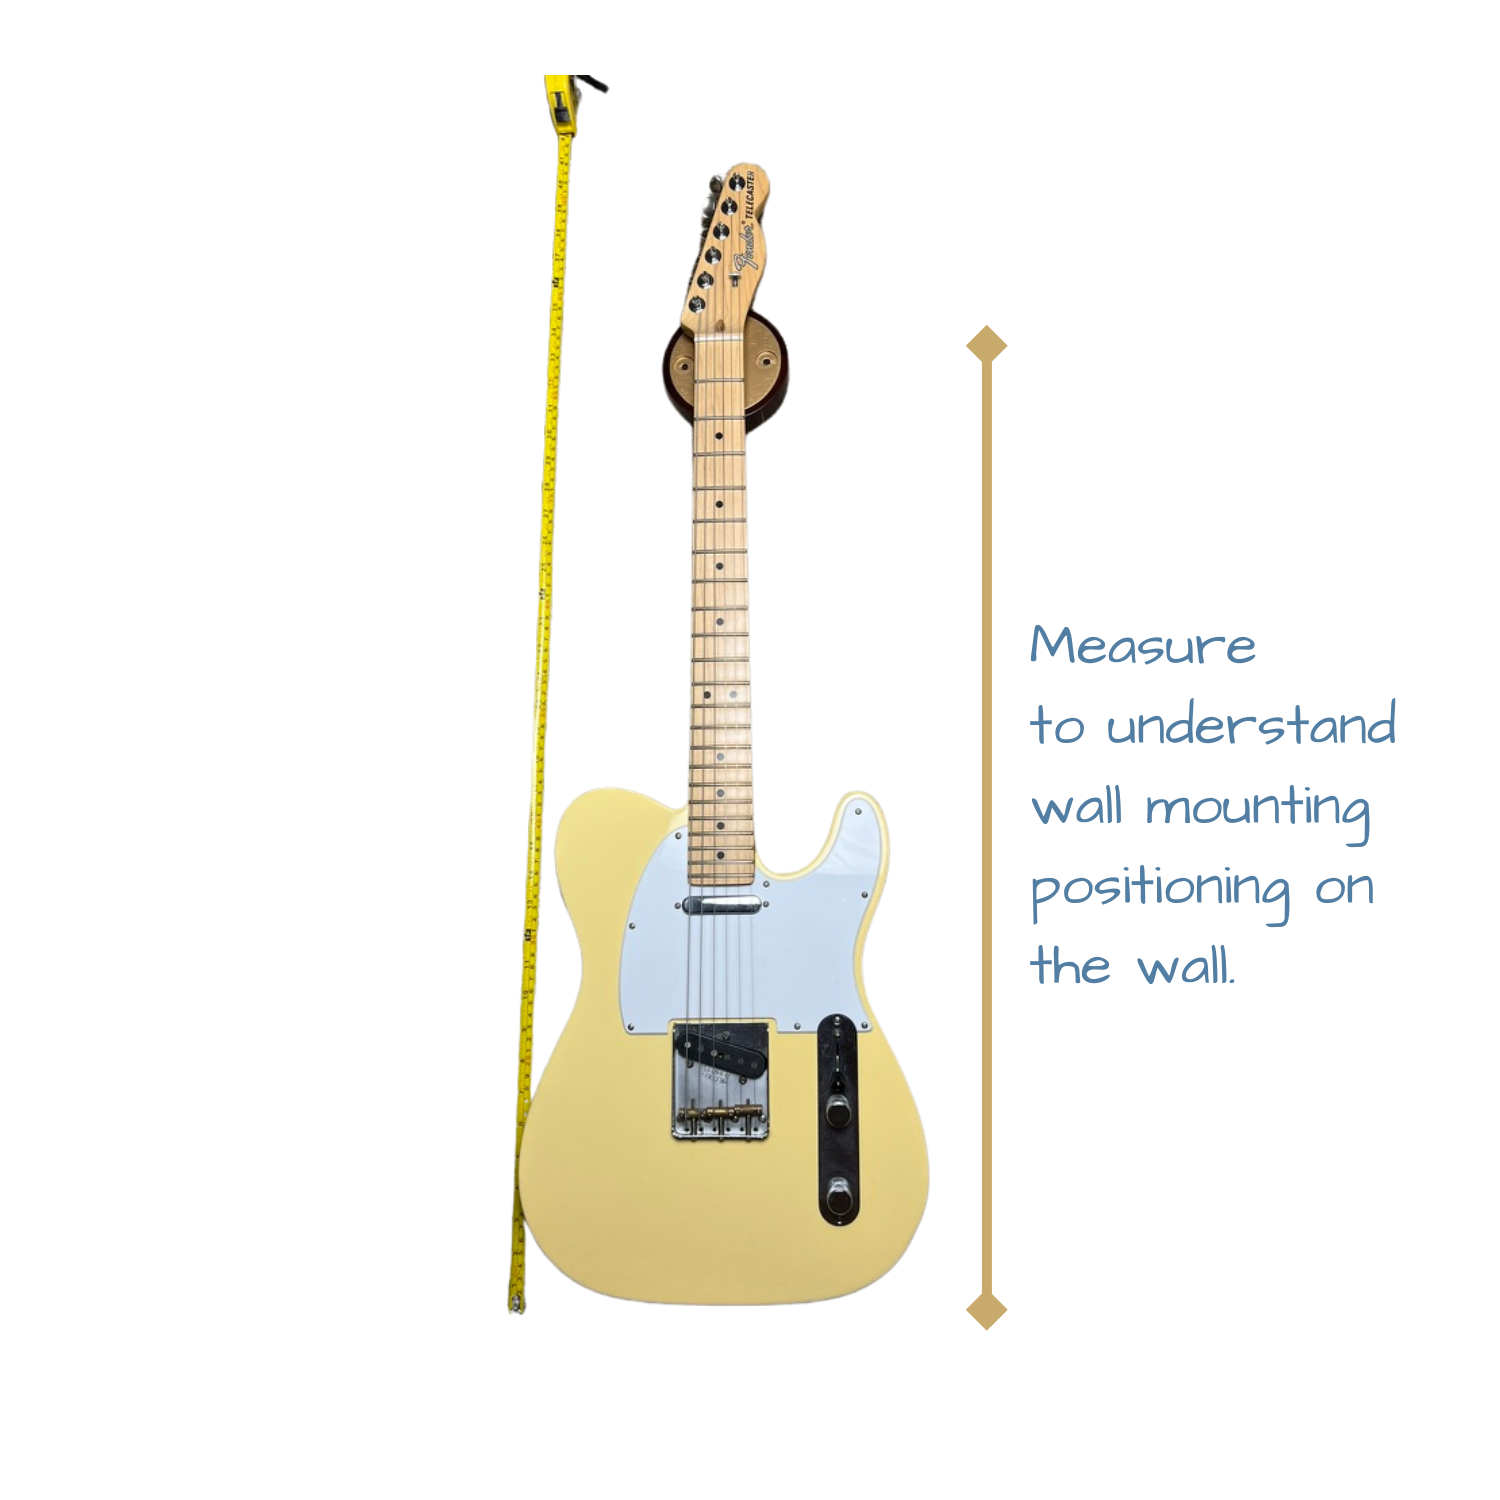

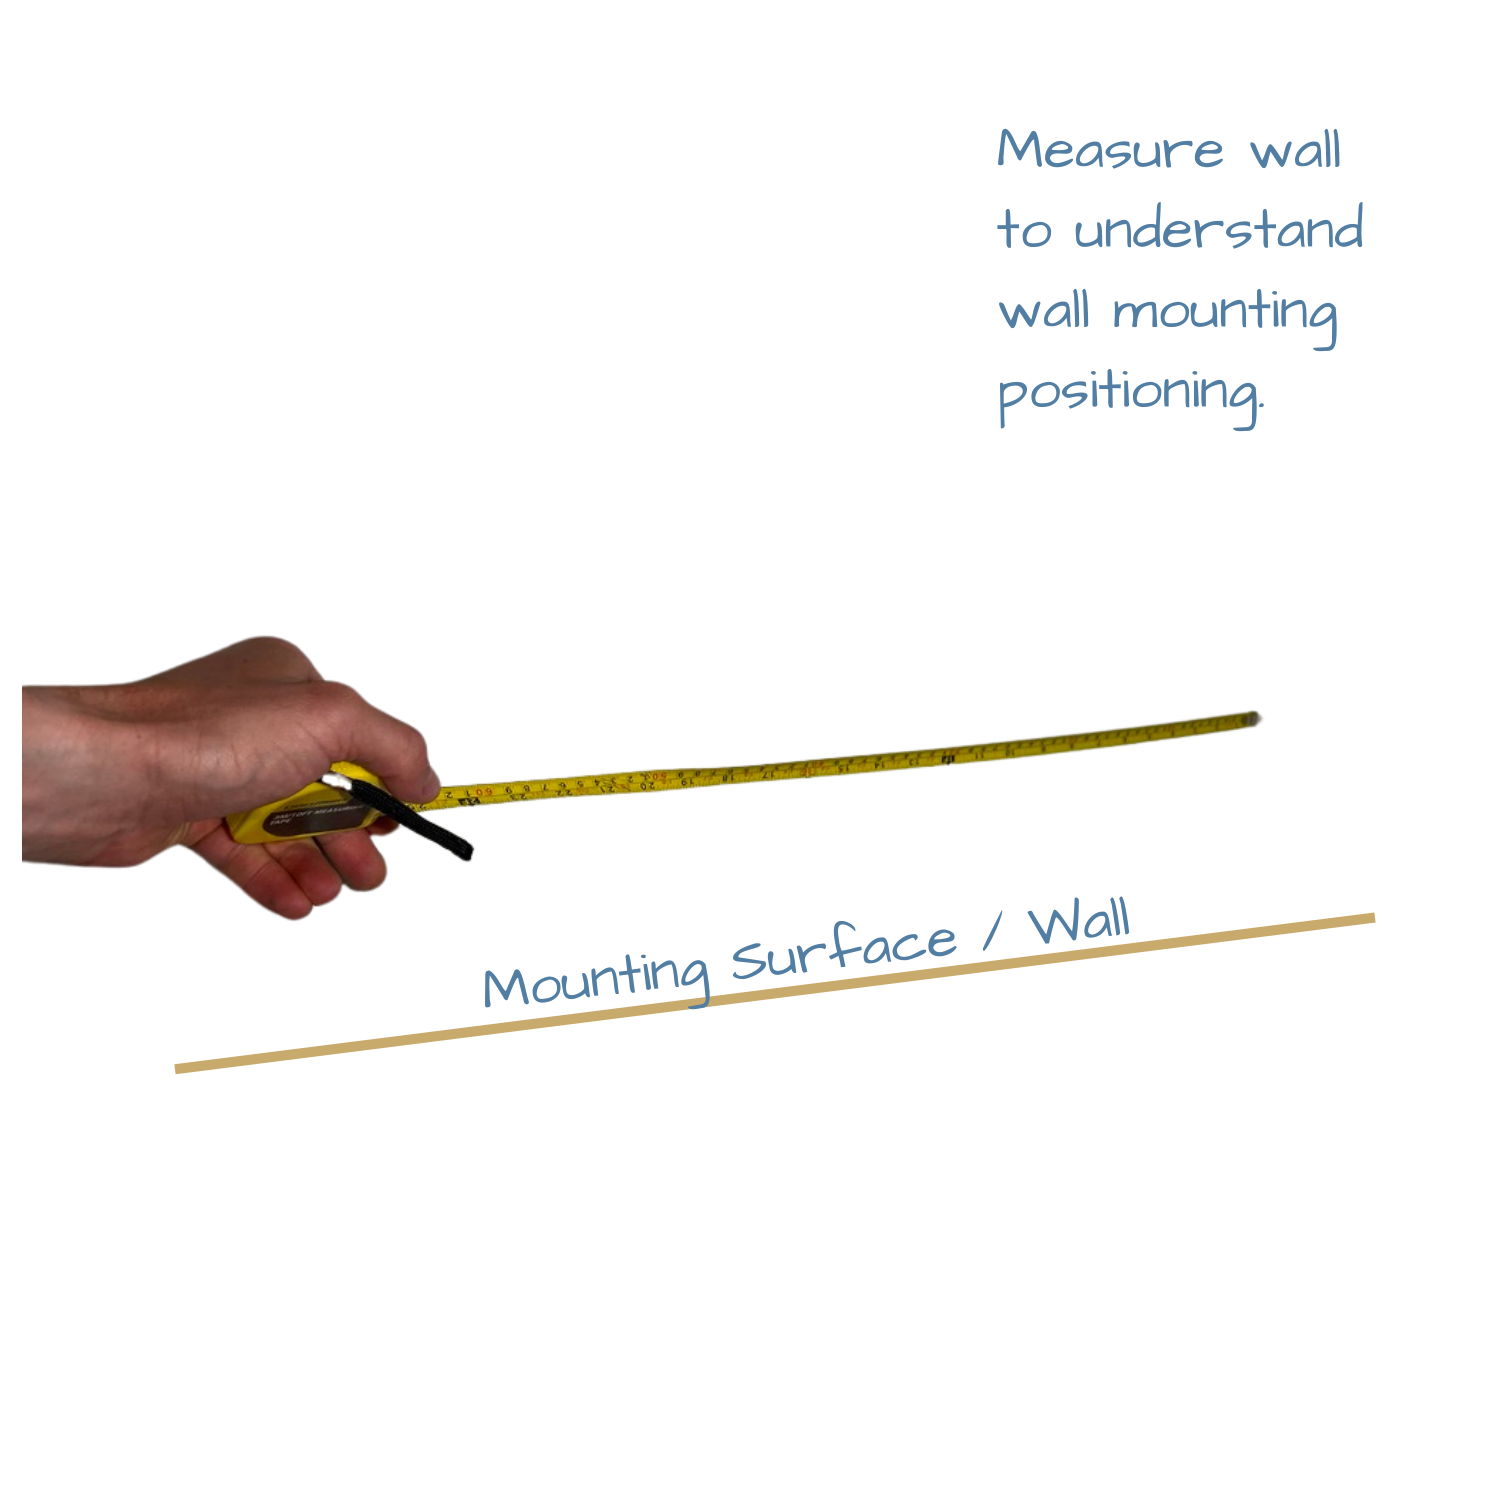
Step 4 – Guitar Dimensions
ℹ️ To select the correct mounting height, we recommend you measure the height of your guitar on the hanger, to confirm where the guitar will end.
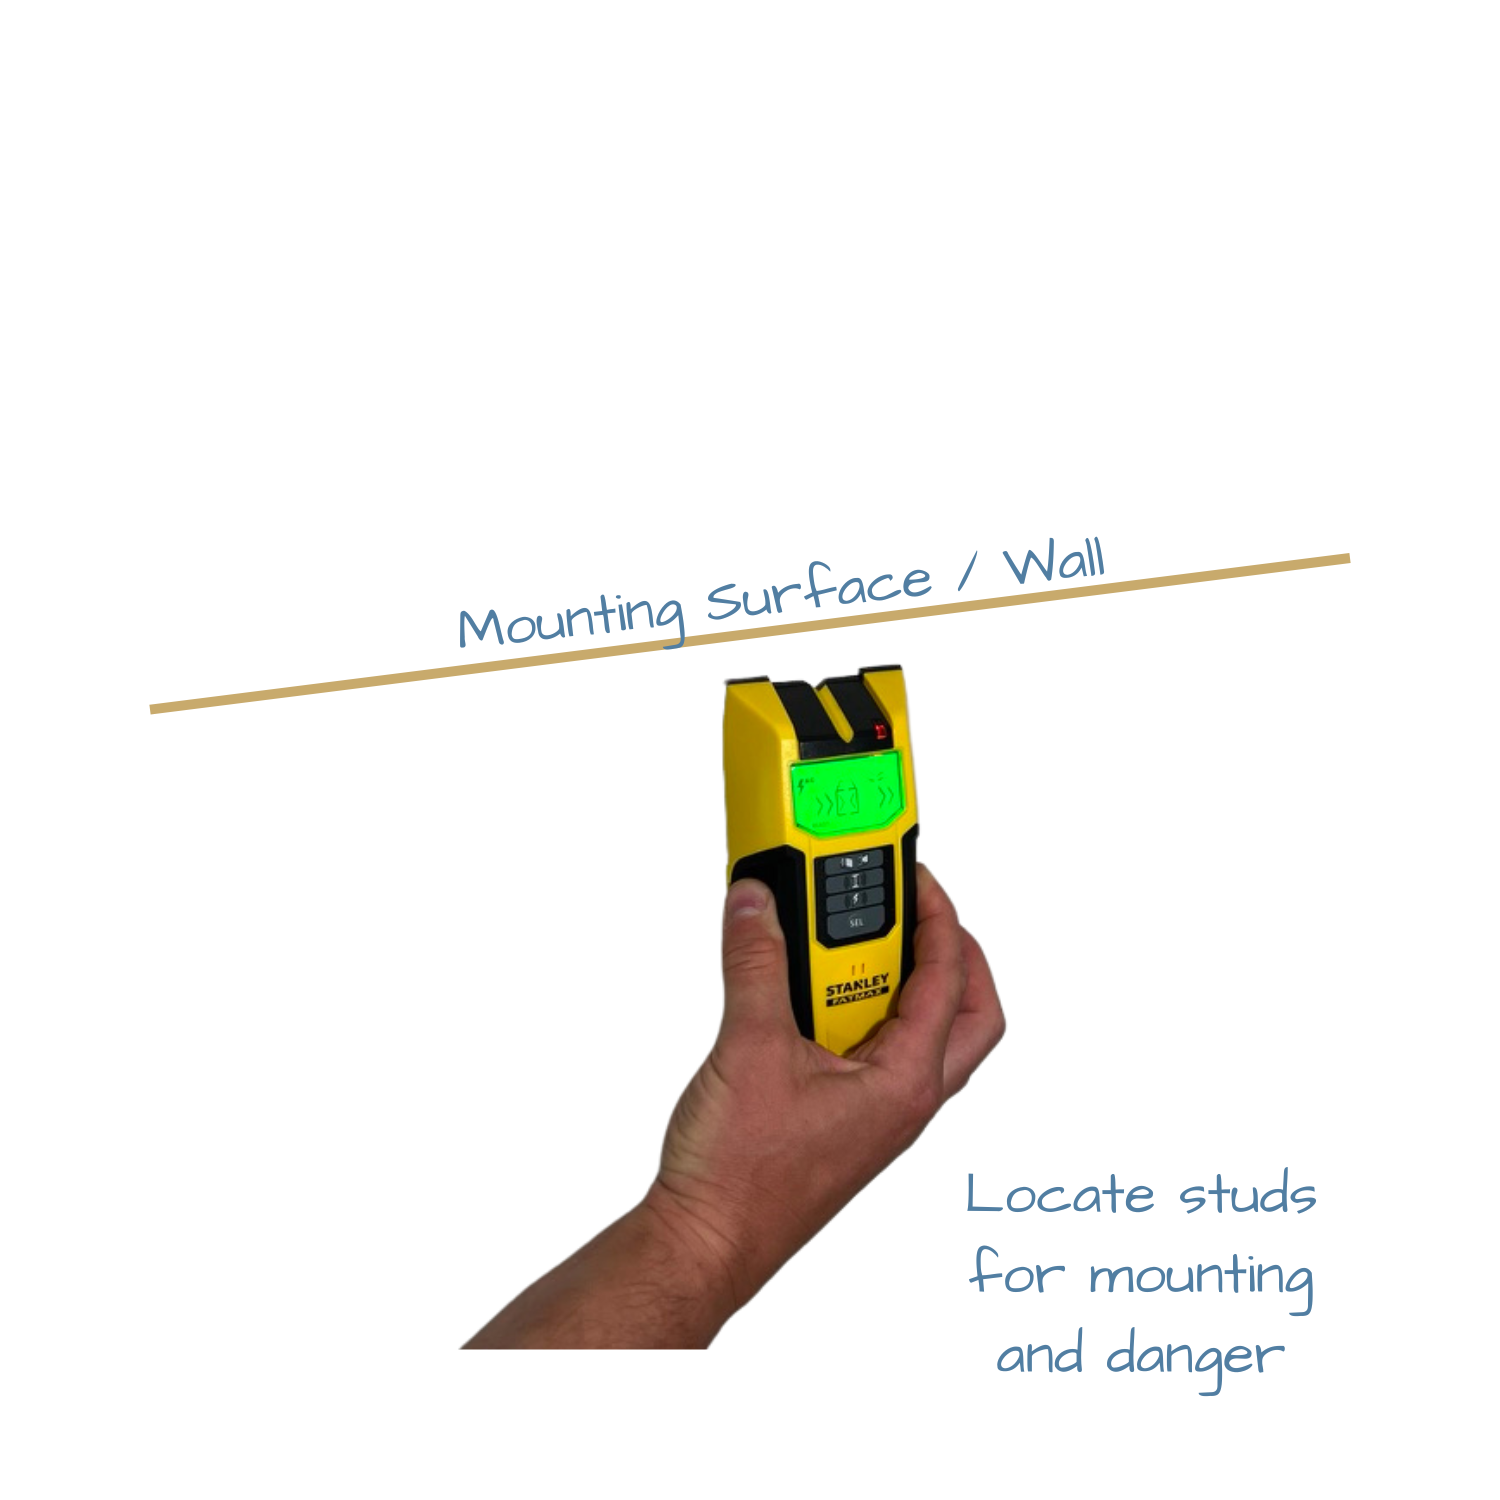

Step 5 - Wall Studs
⚡️ Depending on your mounting surface, we highly recommend you use a stud finder to locate structural studs, plumbing or electrical wiring.

Step 6 - Locate Mounting Point
📐Taking in consideration studs and solid structures, locate a suitable location to mount the wall hanger. A central point can be marked through the central hole of the outer wall hanger.
Part 2: Wall Mounting
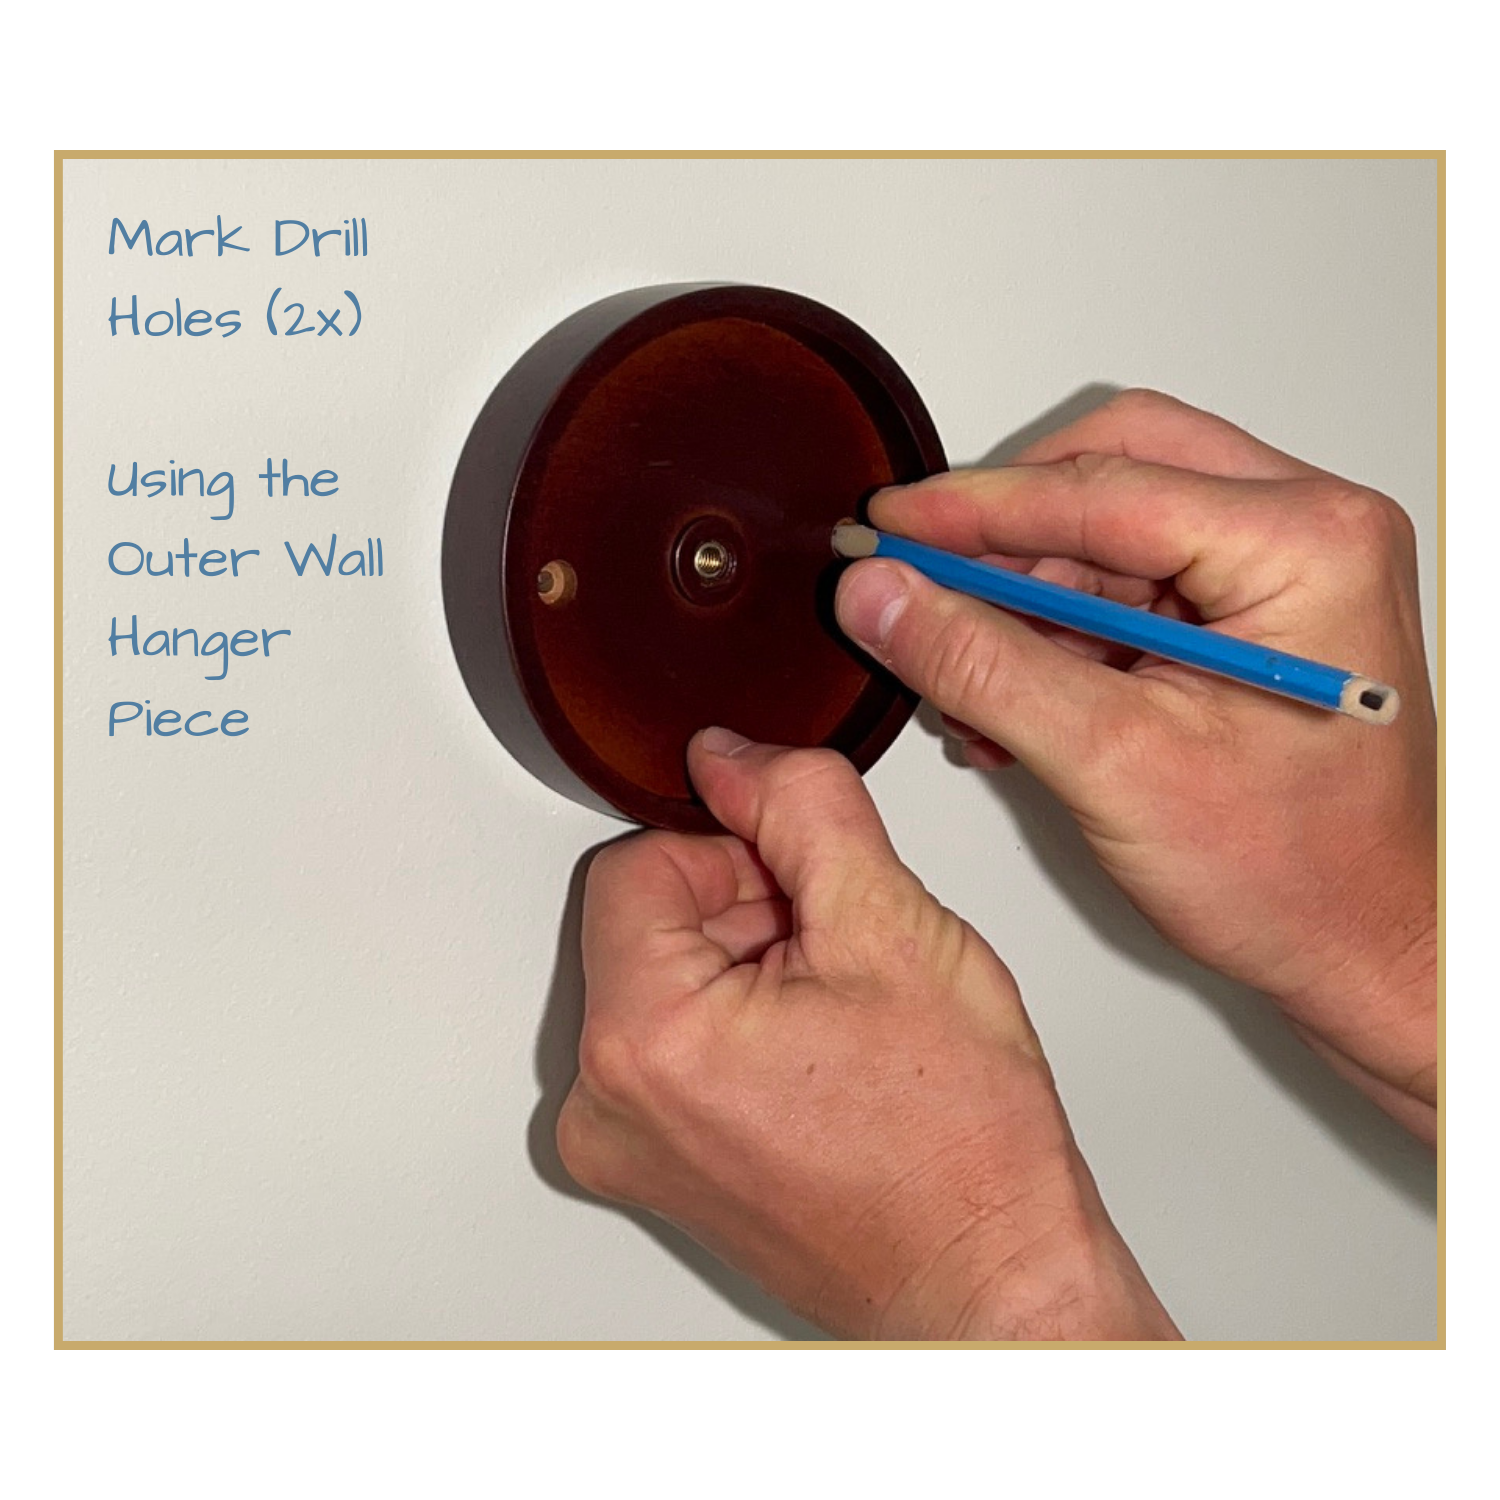

Step 7 - Mark Drill Holes
✏️ Once a suitable location has been identified, use a pencil/marker through the two mounting holes in the outer wall hanger to mark the two drill marks.
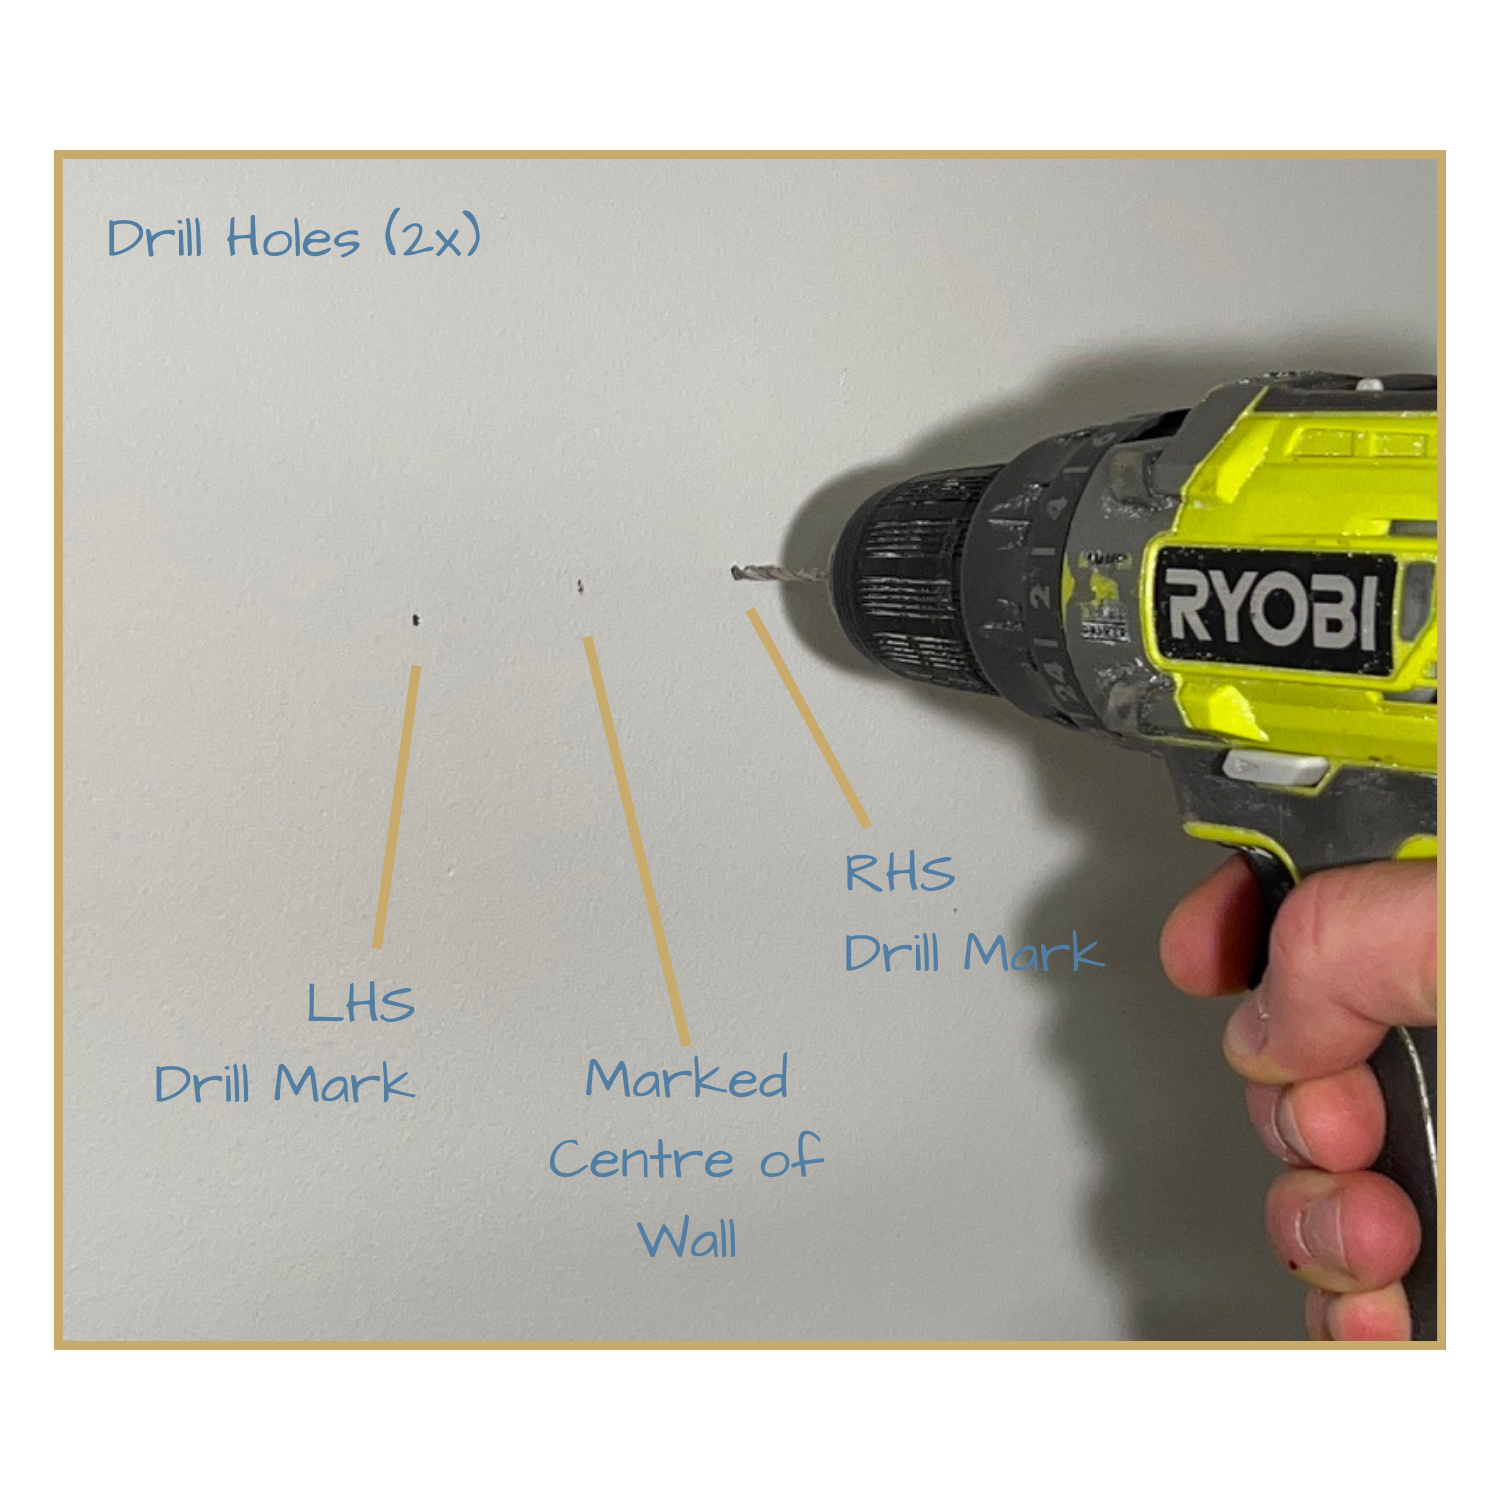

Step 8 - Drill Holes
🪛 Use a drill to drill two holes suitable for the selected mounting hardware. For brick surfaces, a hammer drill may be required.
⚠️ Please consult or use a professional.


Step 9 - Outer Hanger Mounting
🔩 Utilising the chosen mounting hardware, attach the outer wall
hanger onto the target surface.
⚠️ Please consult or use a professional.
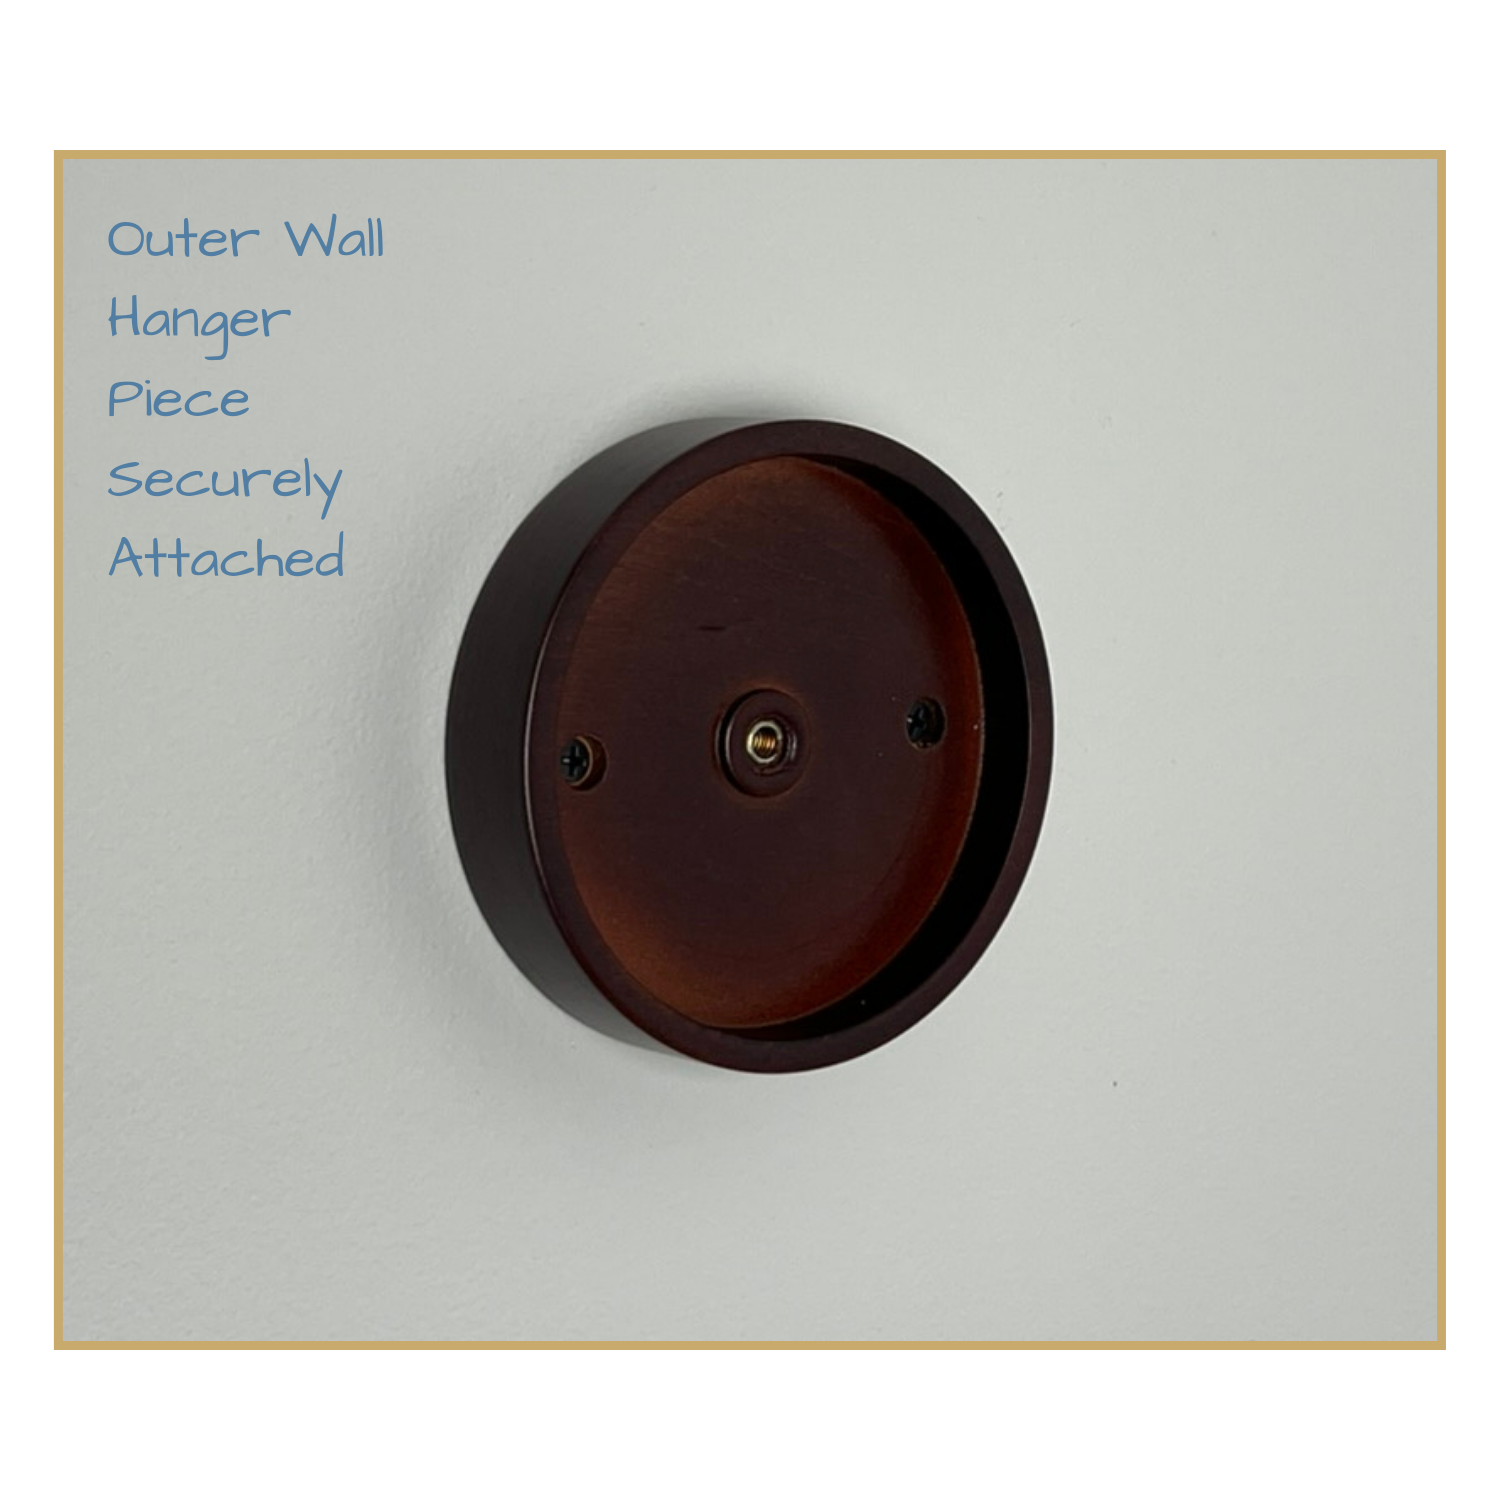

Step 10 - Outer Hanger Secure
The two mounting points, with applicable mounting hardware
ensure a secure fit.
⚠️ Please consult or use a professional.
Part 3: Assembly & Fitment
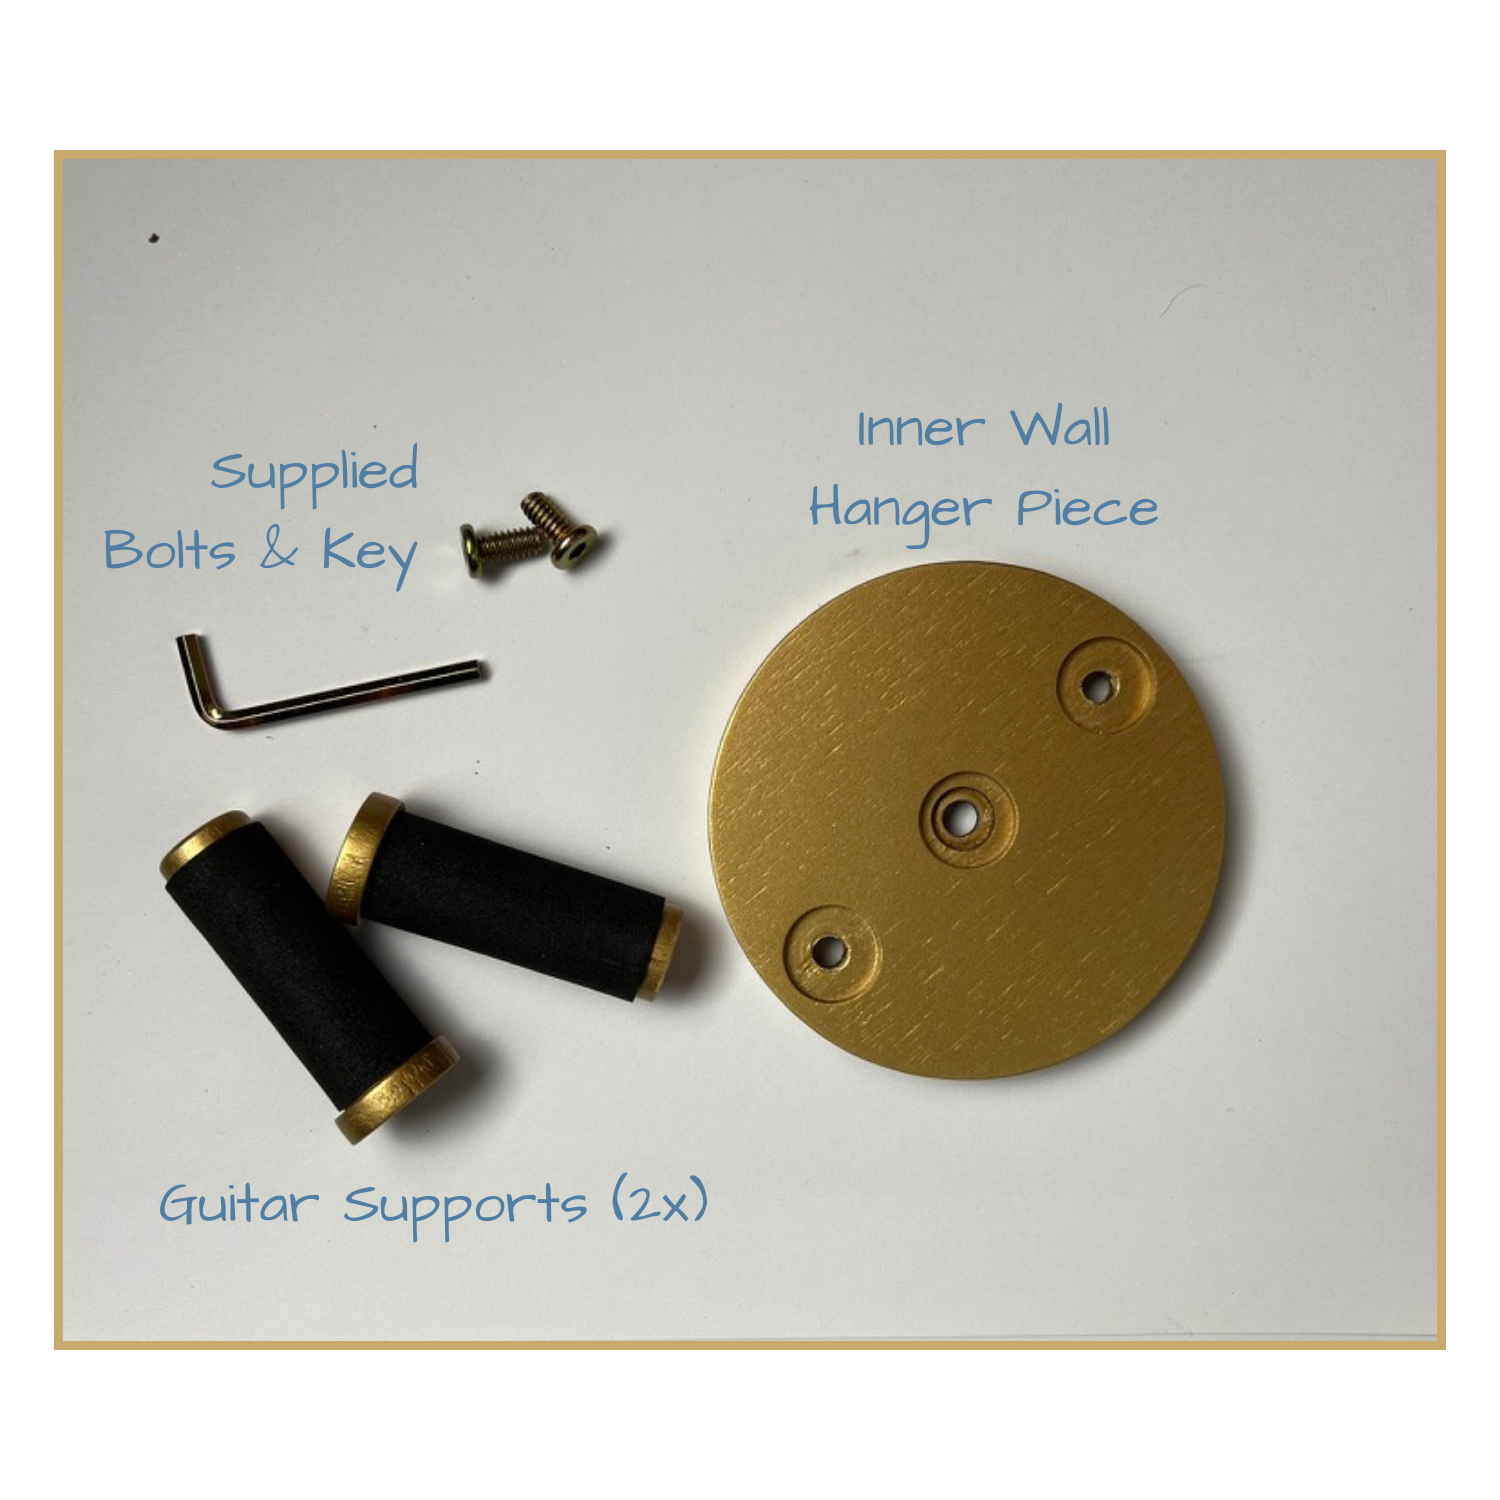

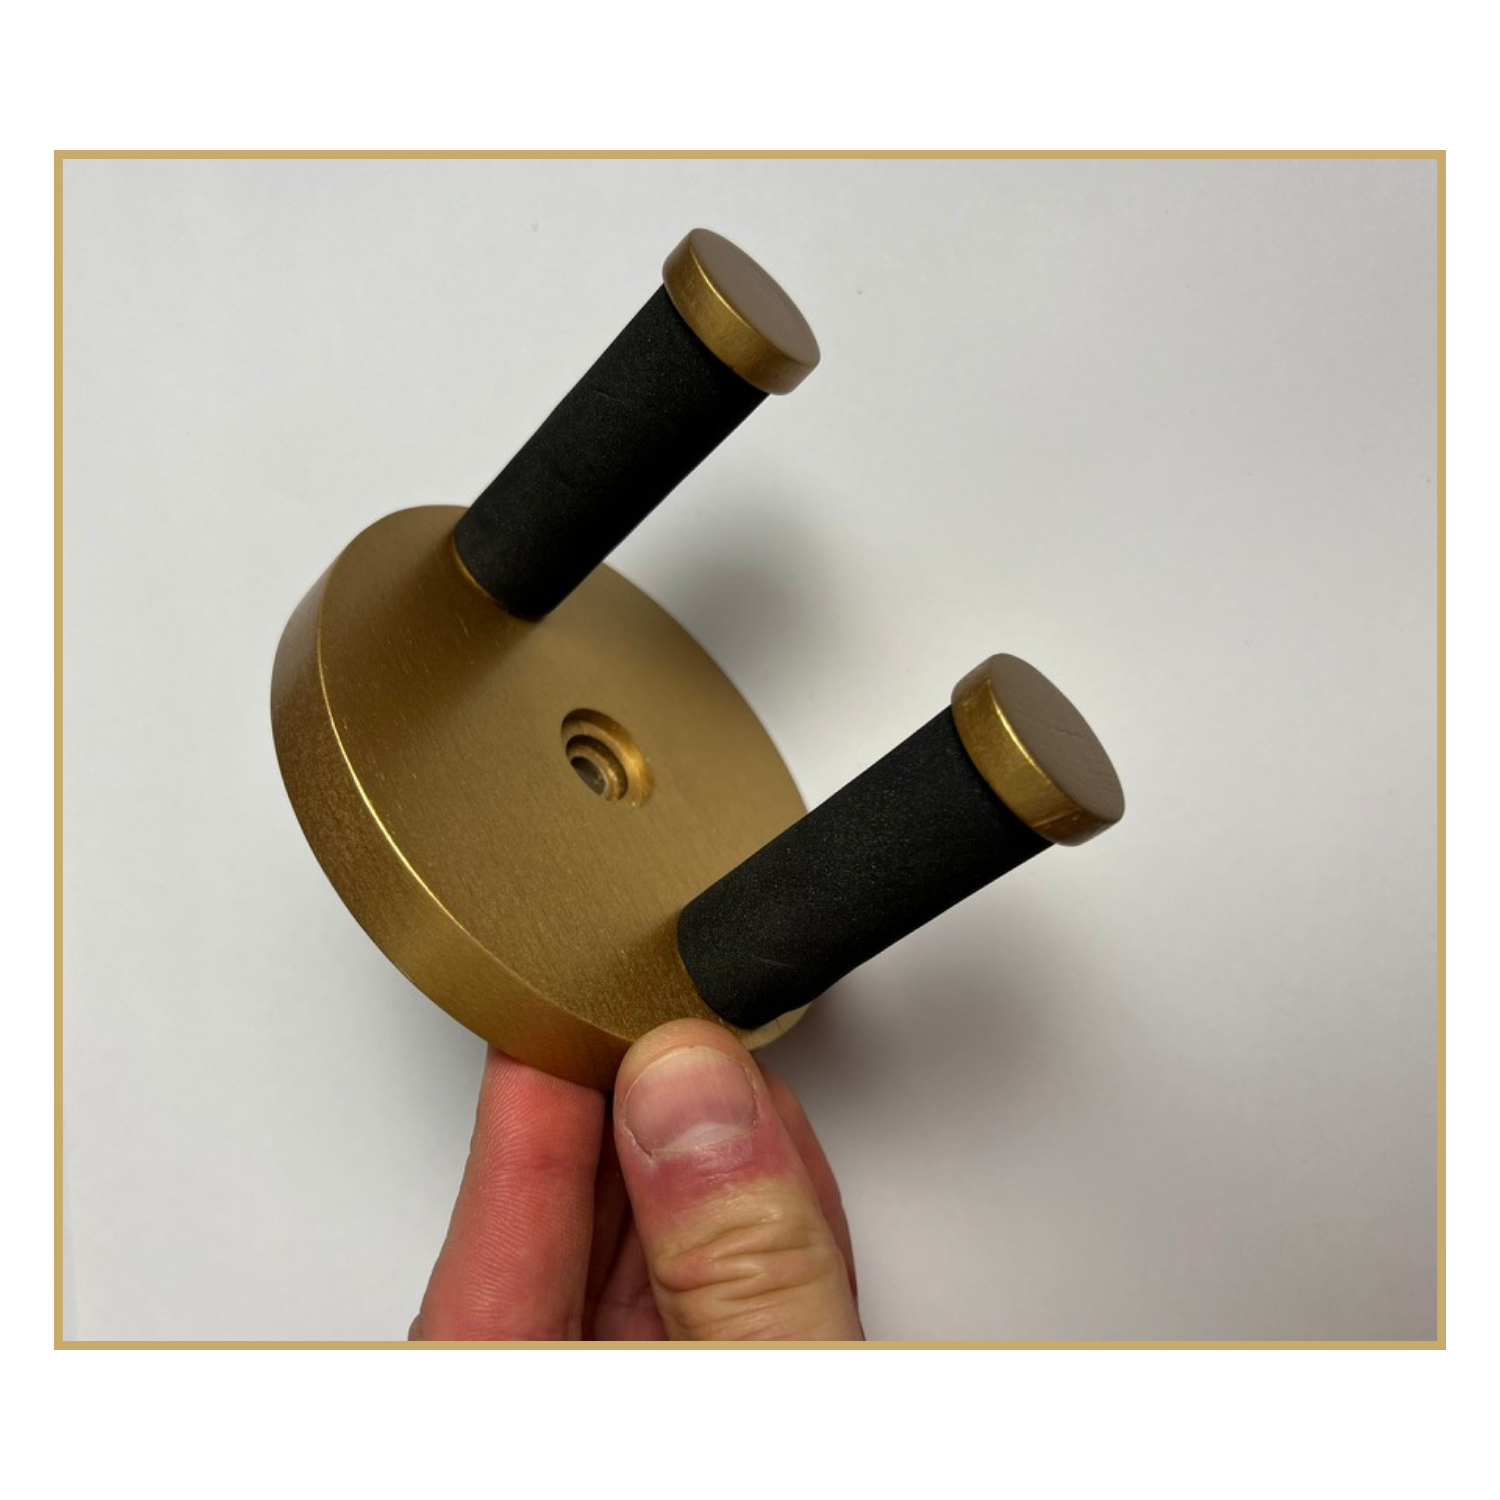
Step 11 - Inner Pieces
The inner wall hanger pieces consist of two guitar supports, the inner wall hanger and applicable hardware.
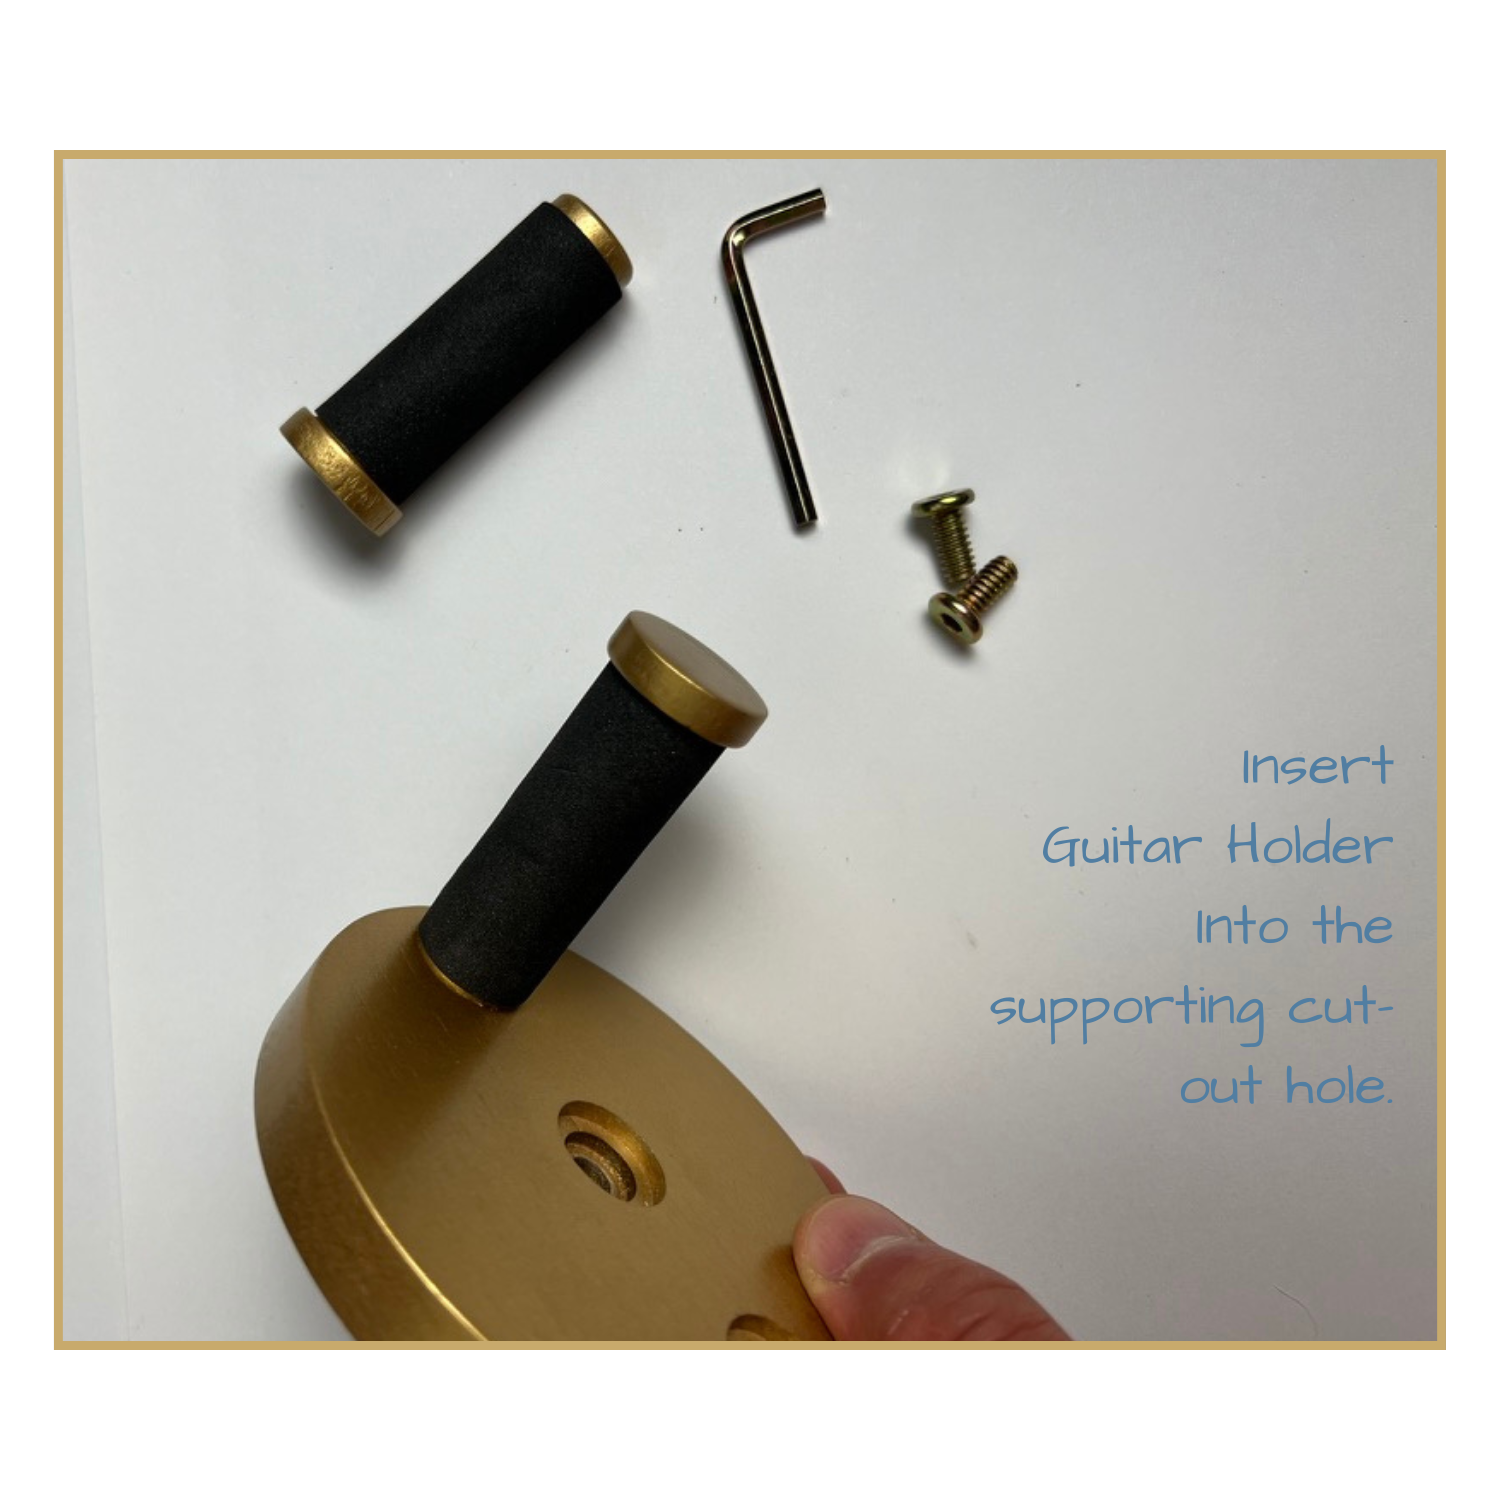

Step 12 - Inserts Holders
Insert the first guitar support piece into the slot in the inner wall hanger. Repeat for the other guitar support piece.
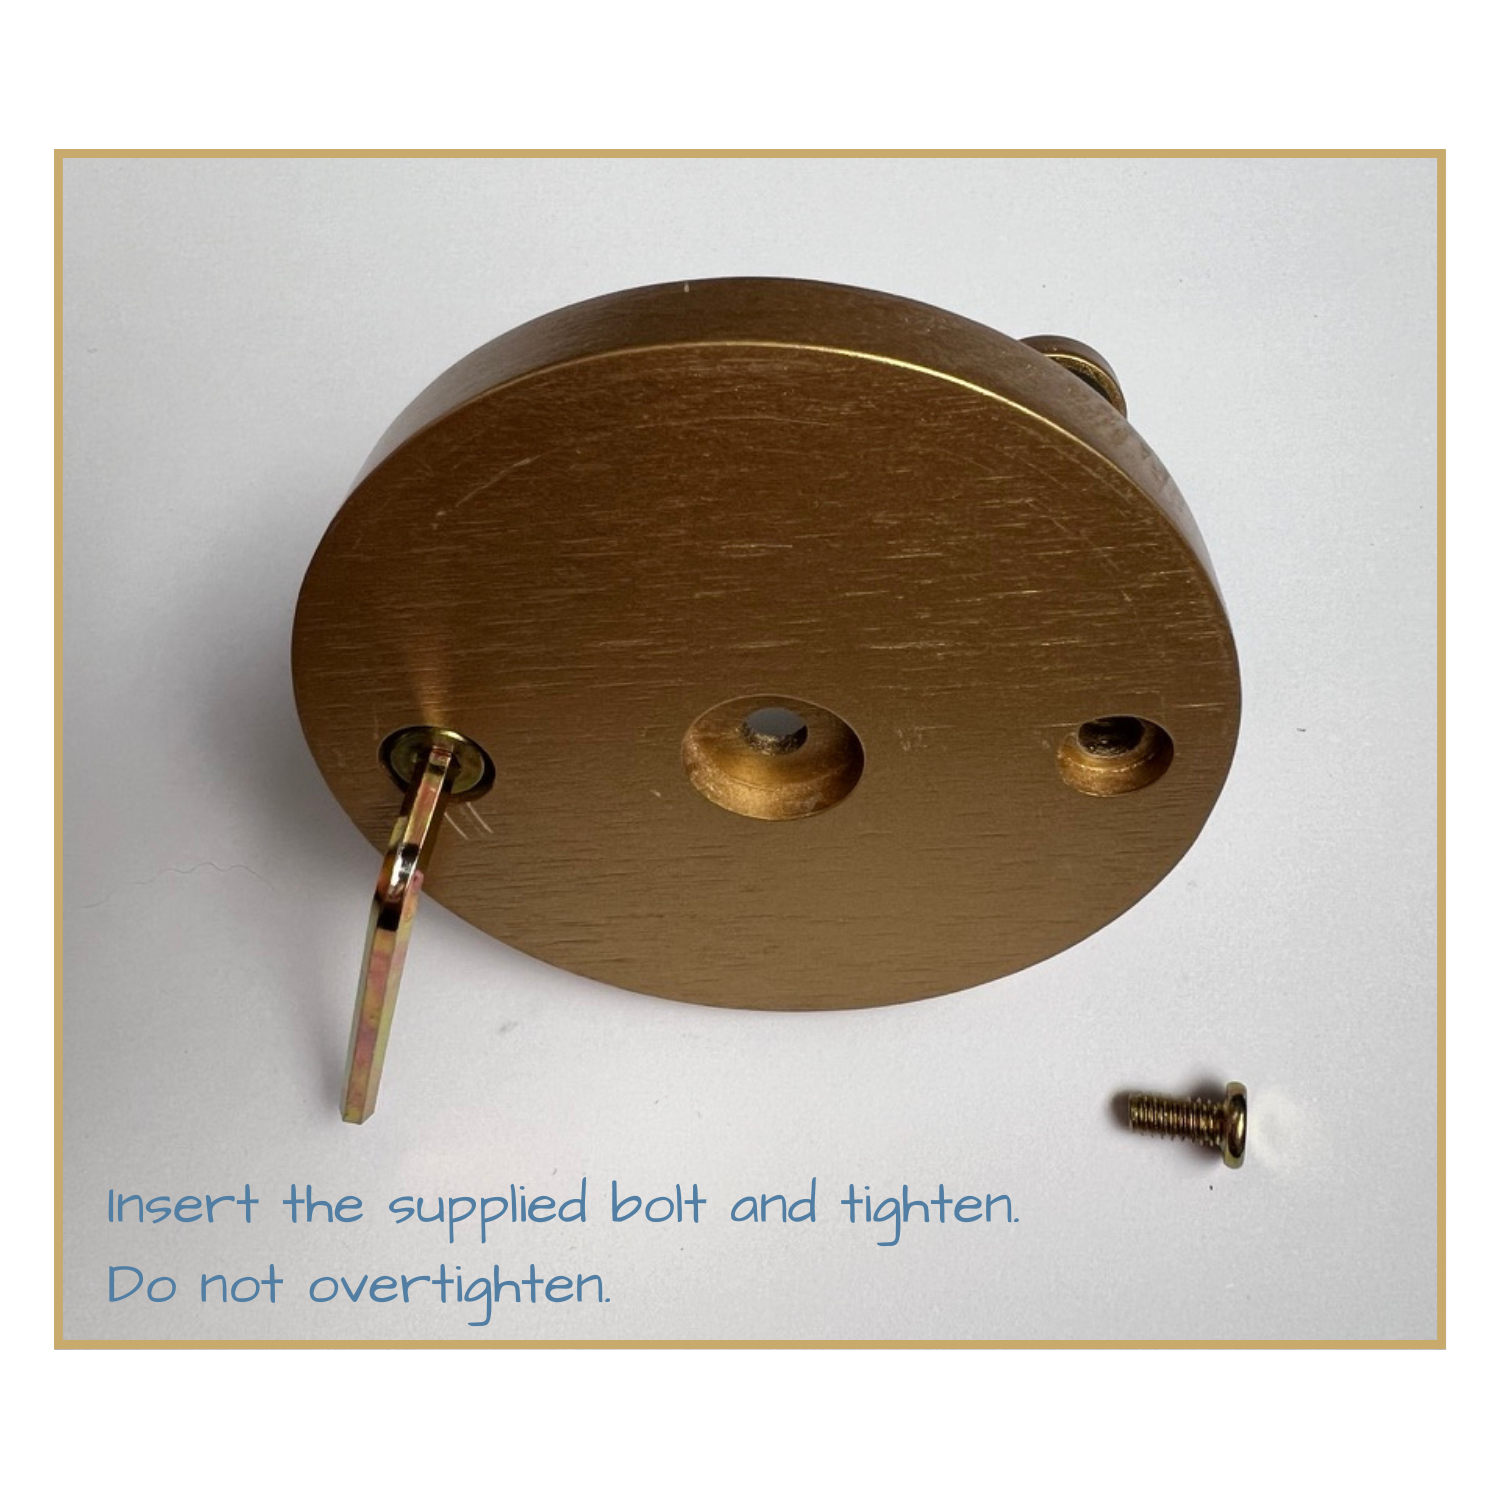

Step 13 - Secure Holders
Insert two of the supplied bolts into each of the guitar support pieces from the back, and securely tighten using the allen key provided. Do not overtighten.

Step 14 - Inner Wall Hanger
The inner guitar wall hanger piece is complete and is ready to be inserted into the outer guitar wall hanger piece.
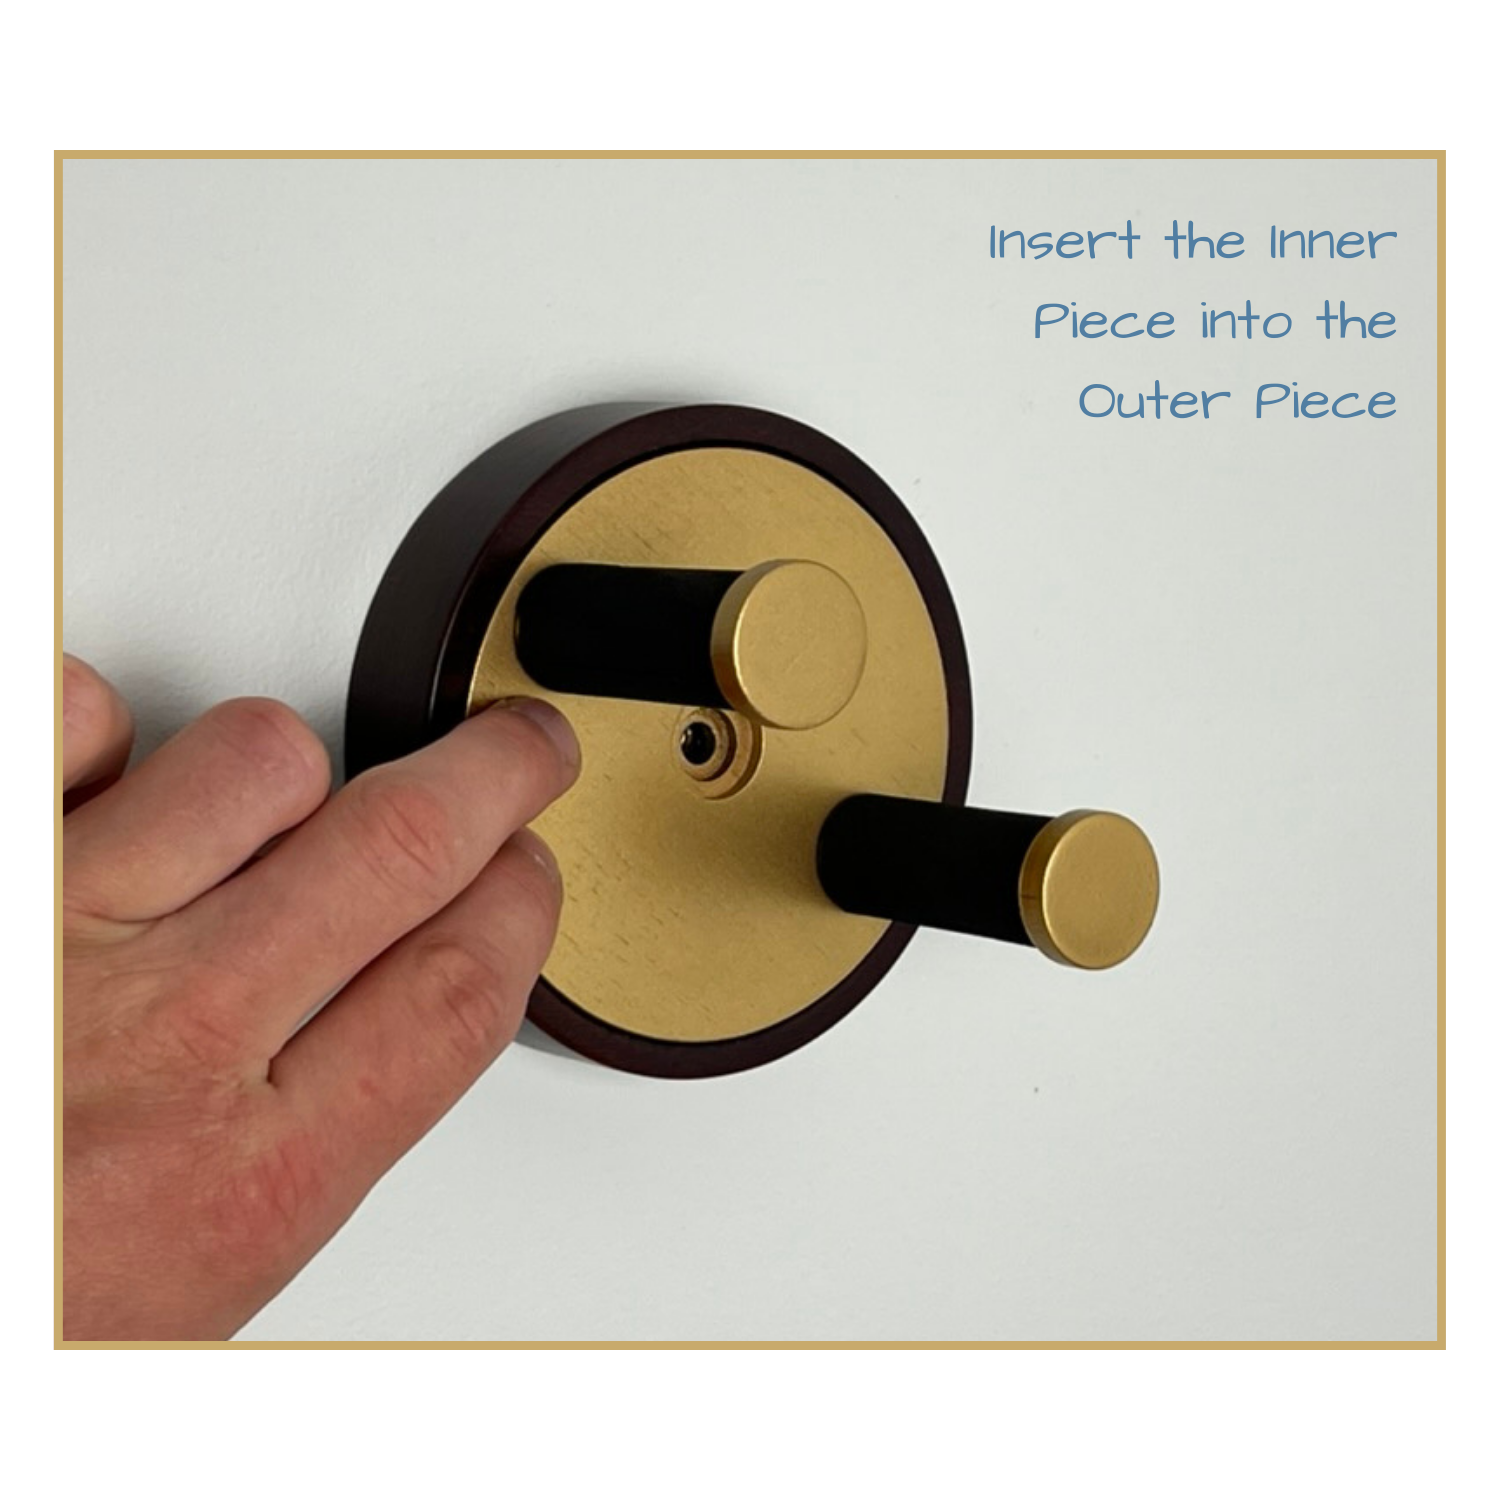

Step 15 - Inner & Outer
Insert the inner guitar wall hanger piece into the outer piece, which has been securely mounted onto the wall.
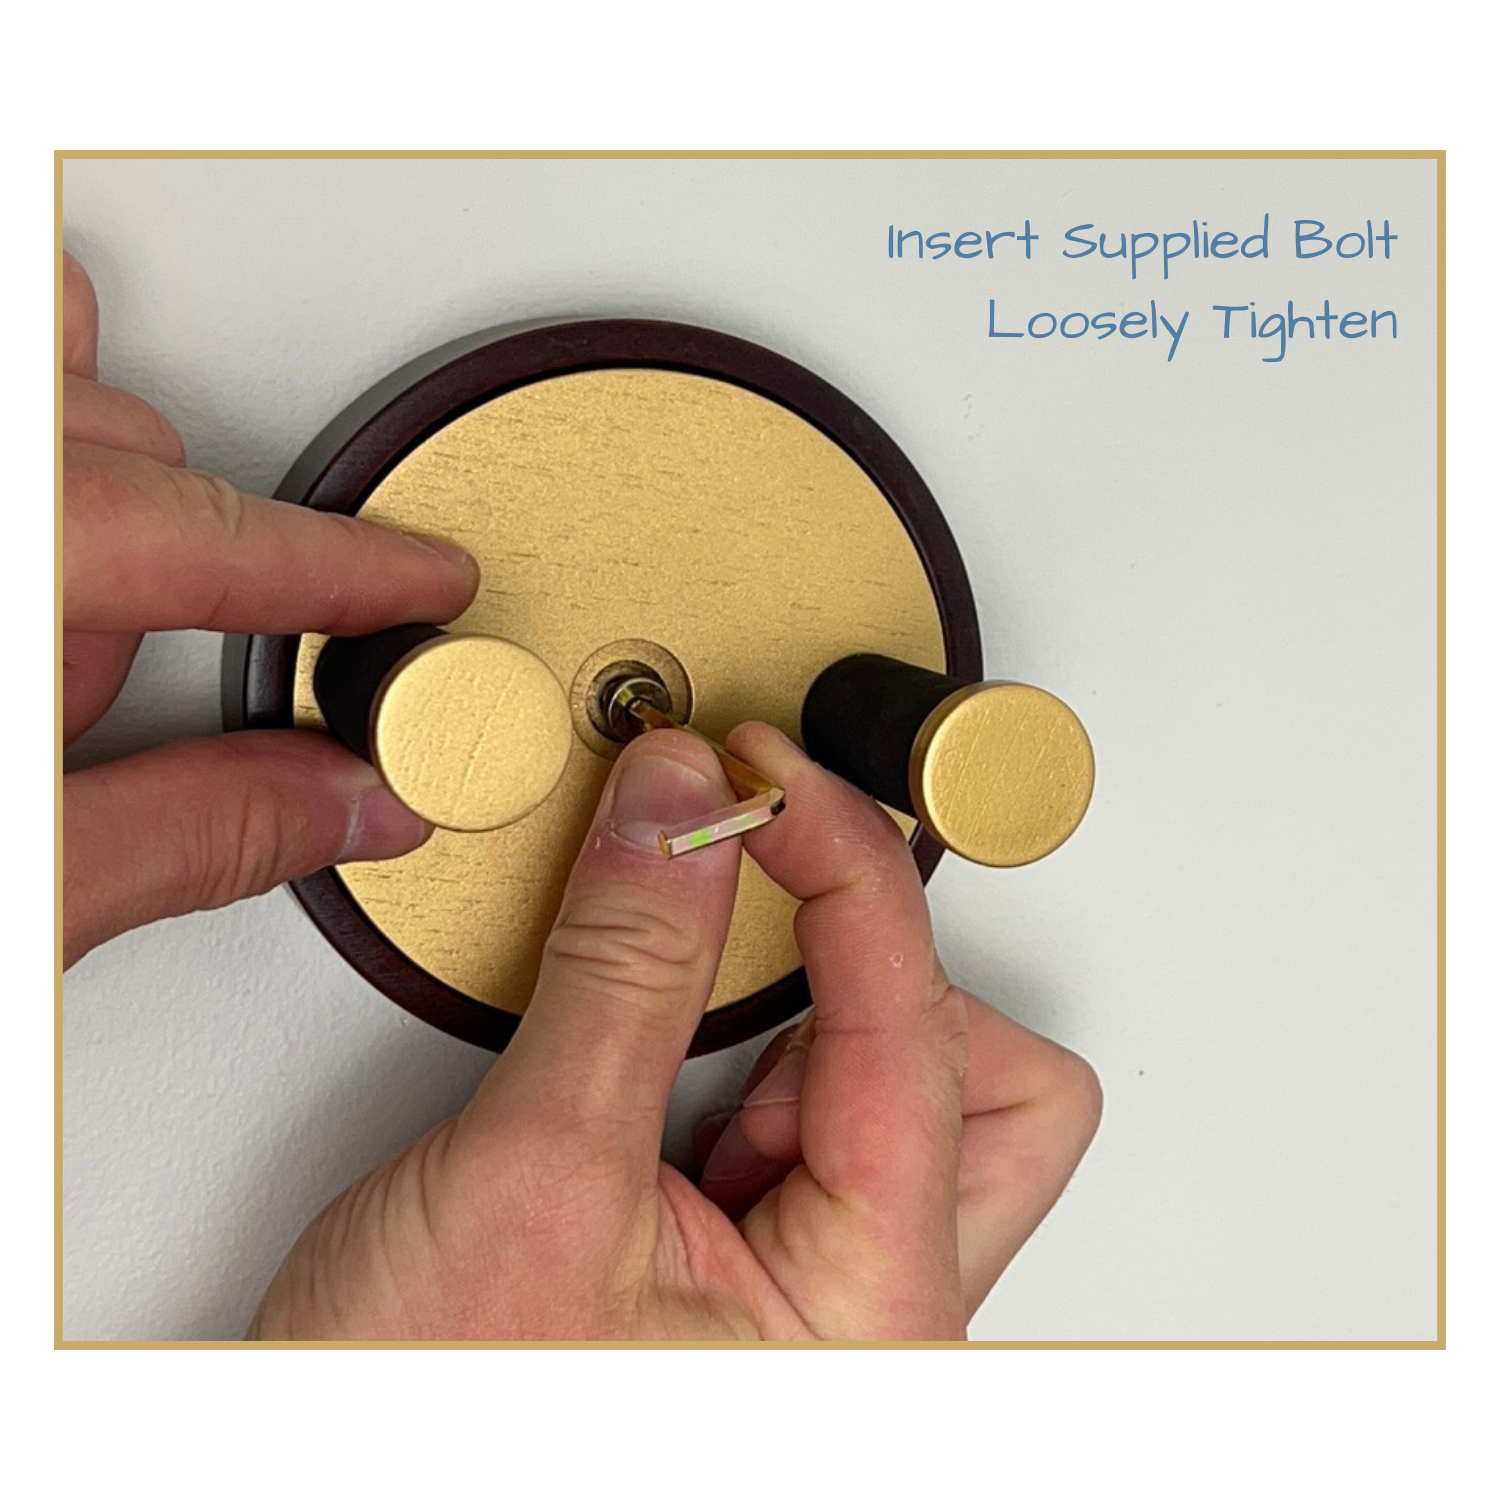

Step 16 - Secure Loosely
Insert the included bolt into the centre, and loosely tighten.
This will enable to inner piece to still rotate.
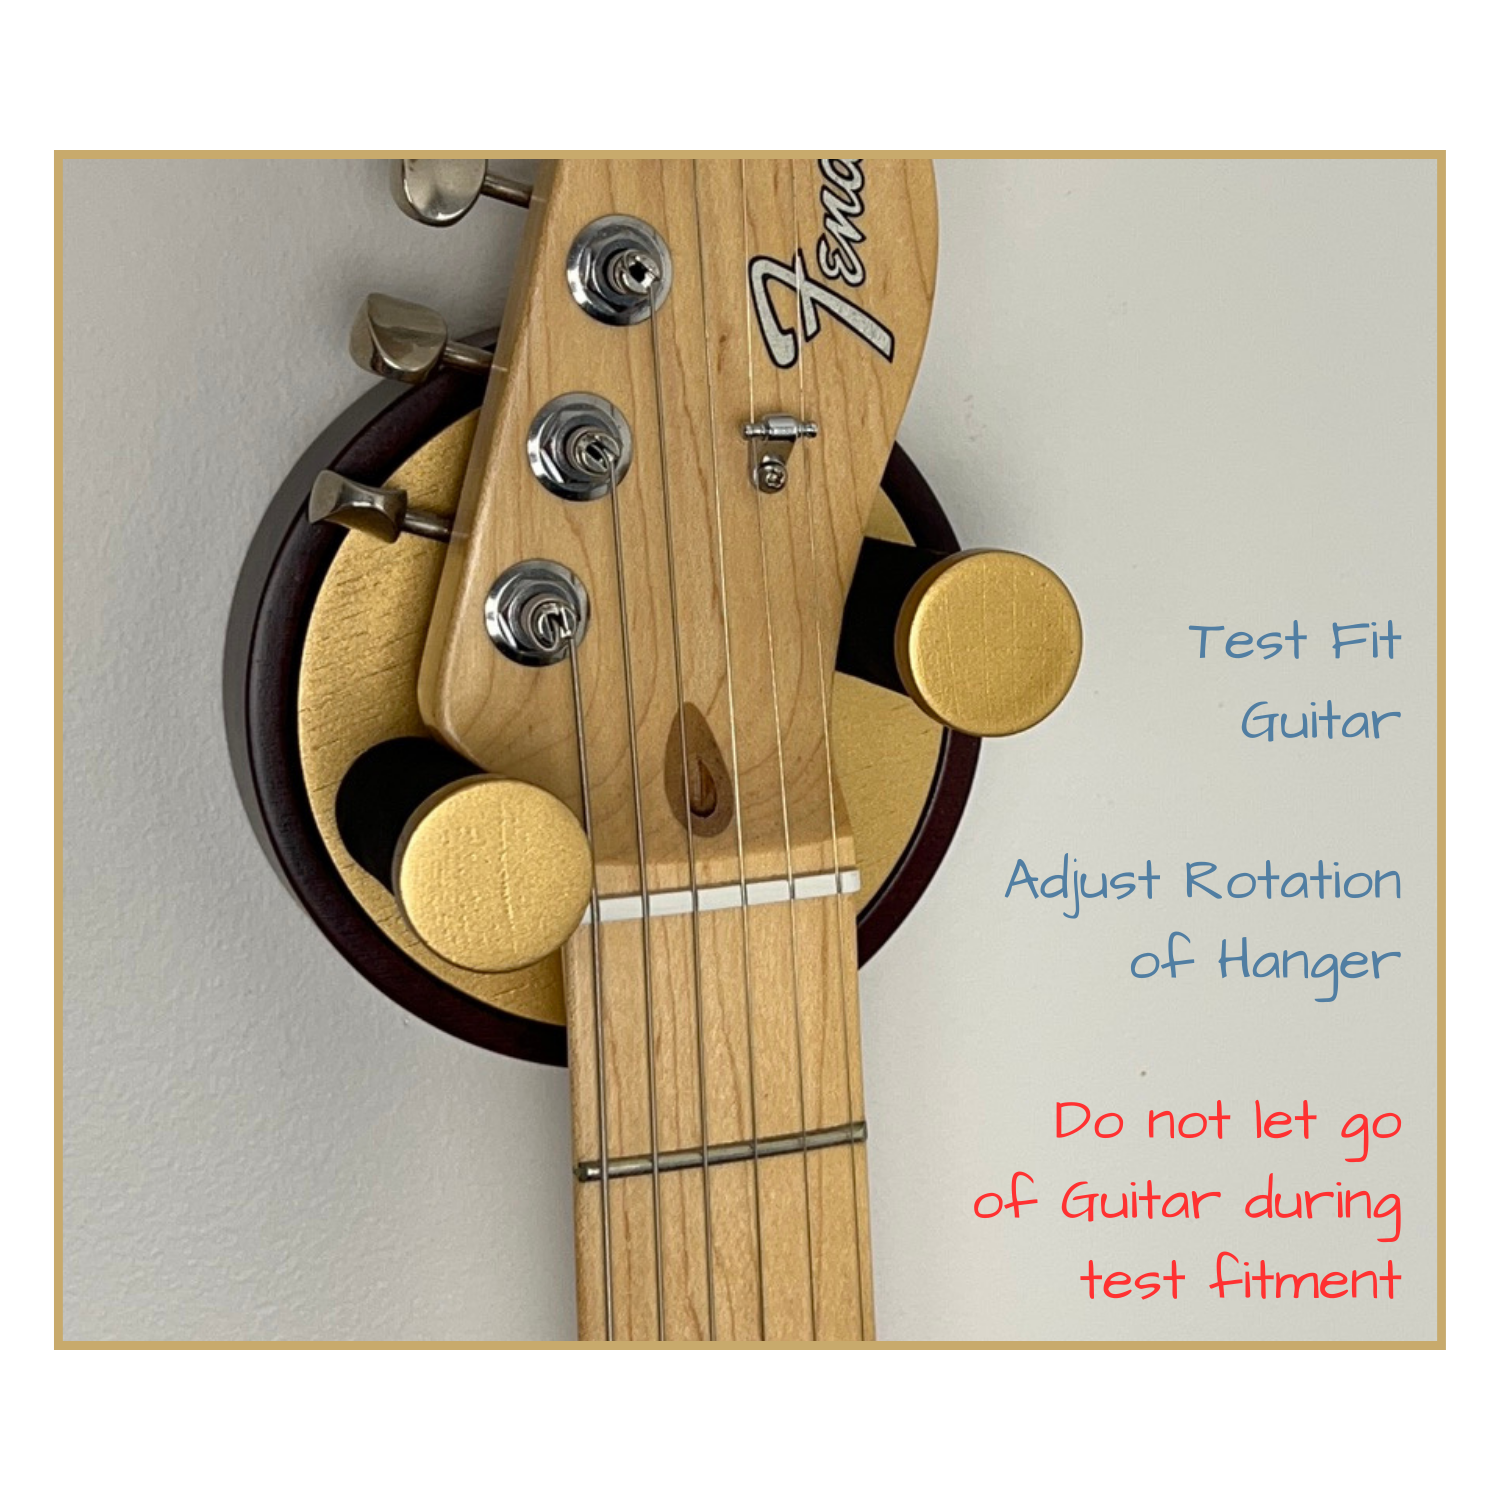

Step 17 - Desired Rotation
The hanger is designed to rotate to suit different head stocks. Holding the guitar, rotate the inner piece to a desired rotation.
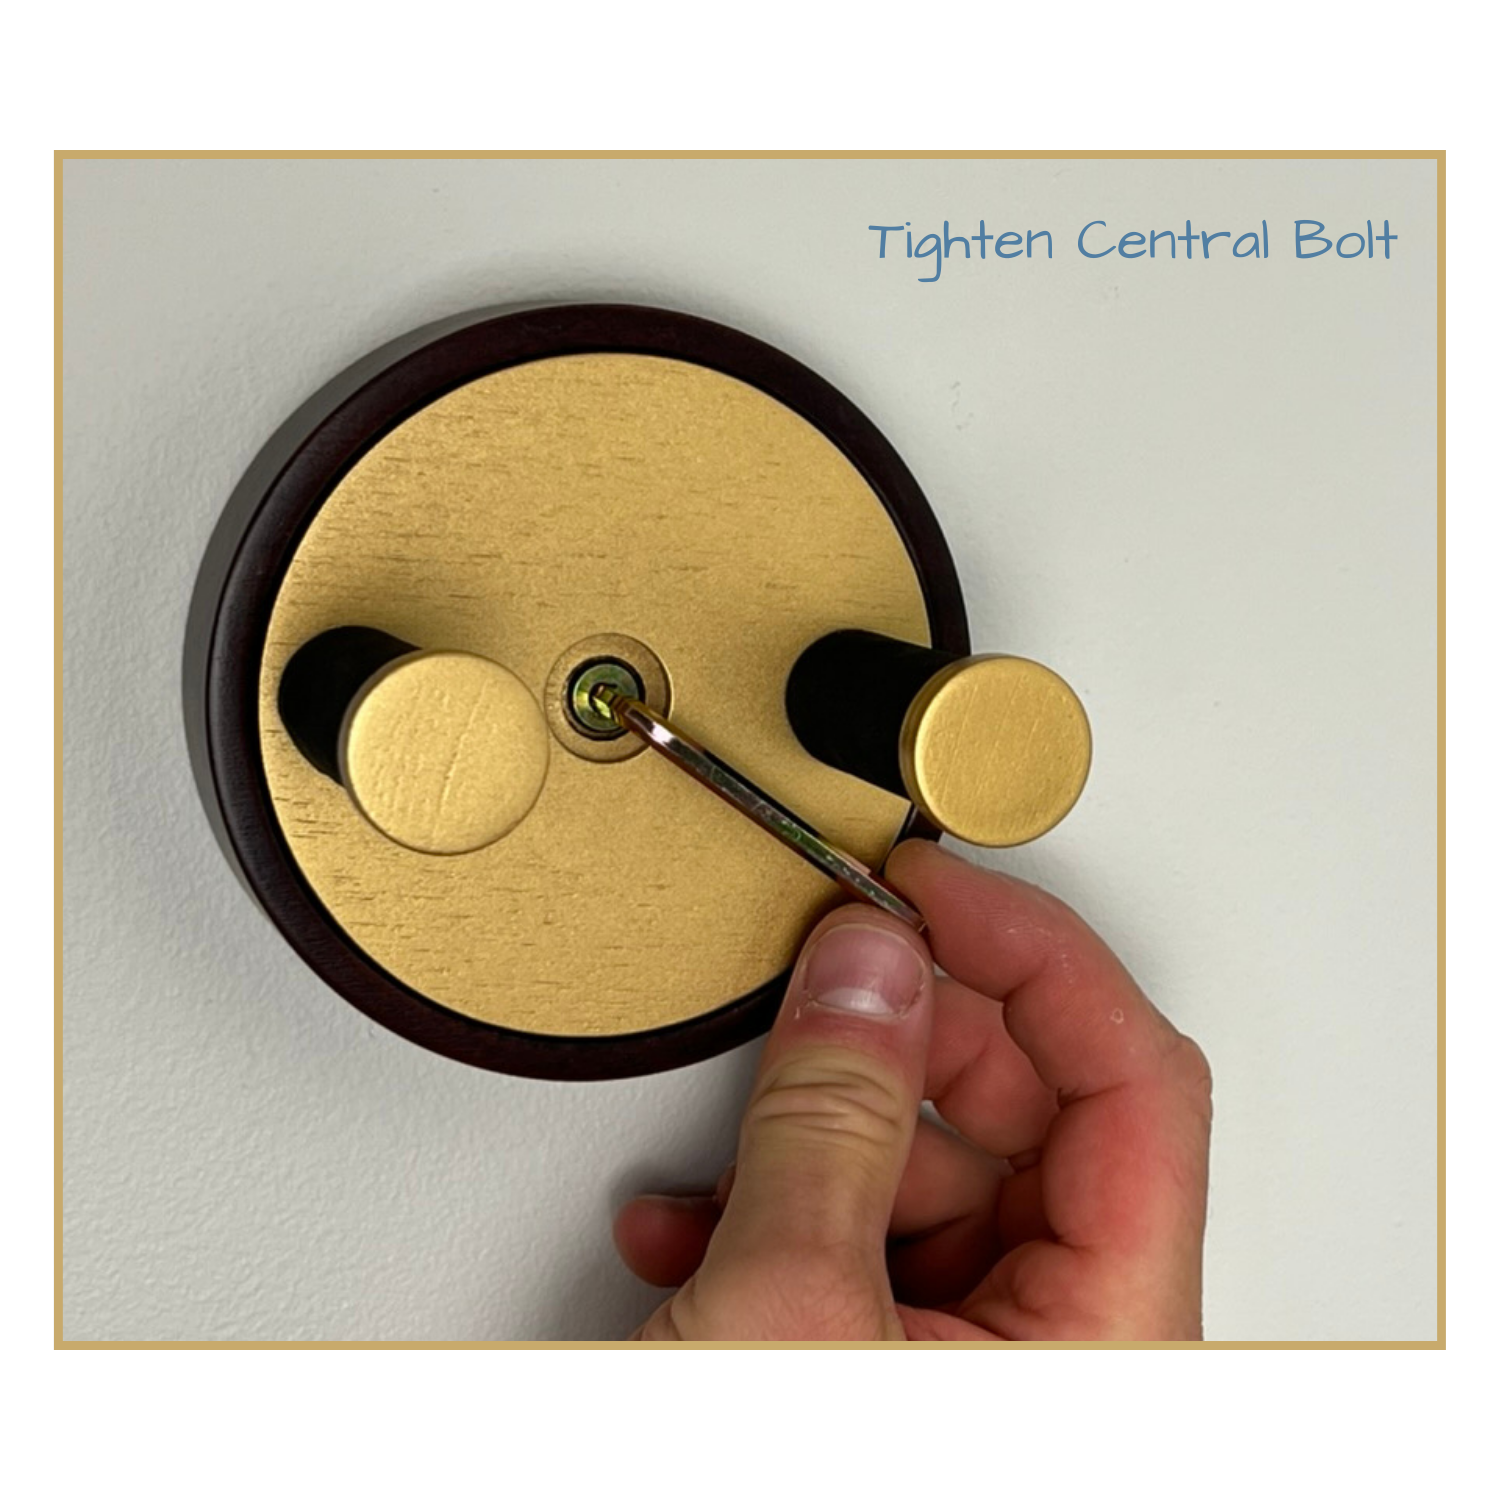

Step 18 - Securing
Once the desired rotation has been selected, tighten the central
bolt. Do not overtighten, the bolt does not take the full weight, but simply ensure the inner piece does not pop out.
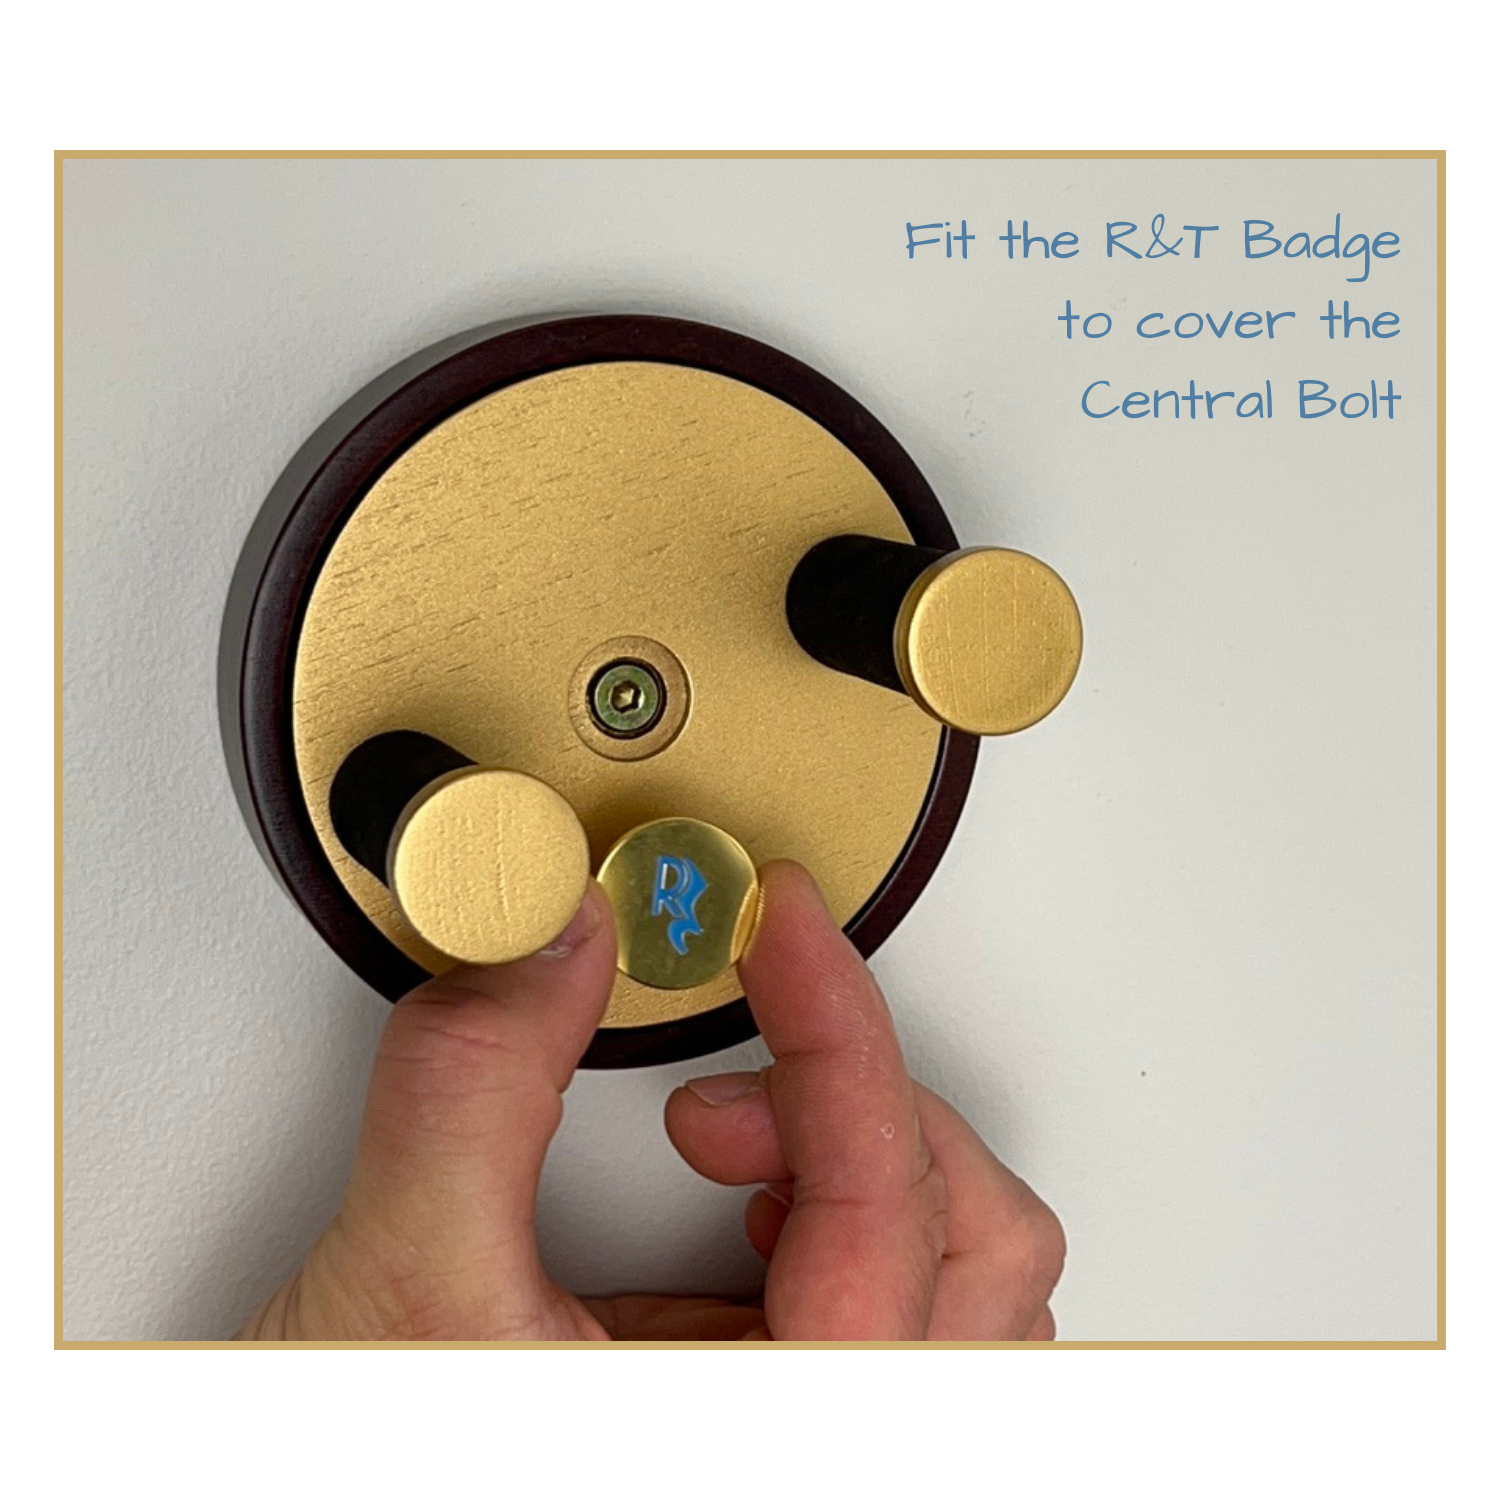

Step 19 - Our Badge
To hide the central bolt, insert our Rhythm & TImbre logo into the centre of the wall hanger.
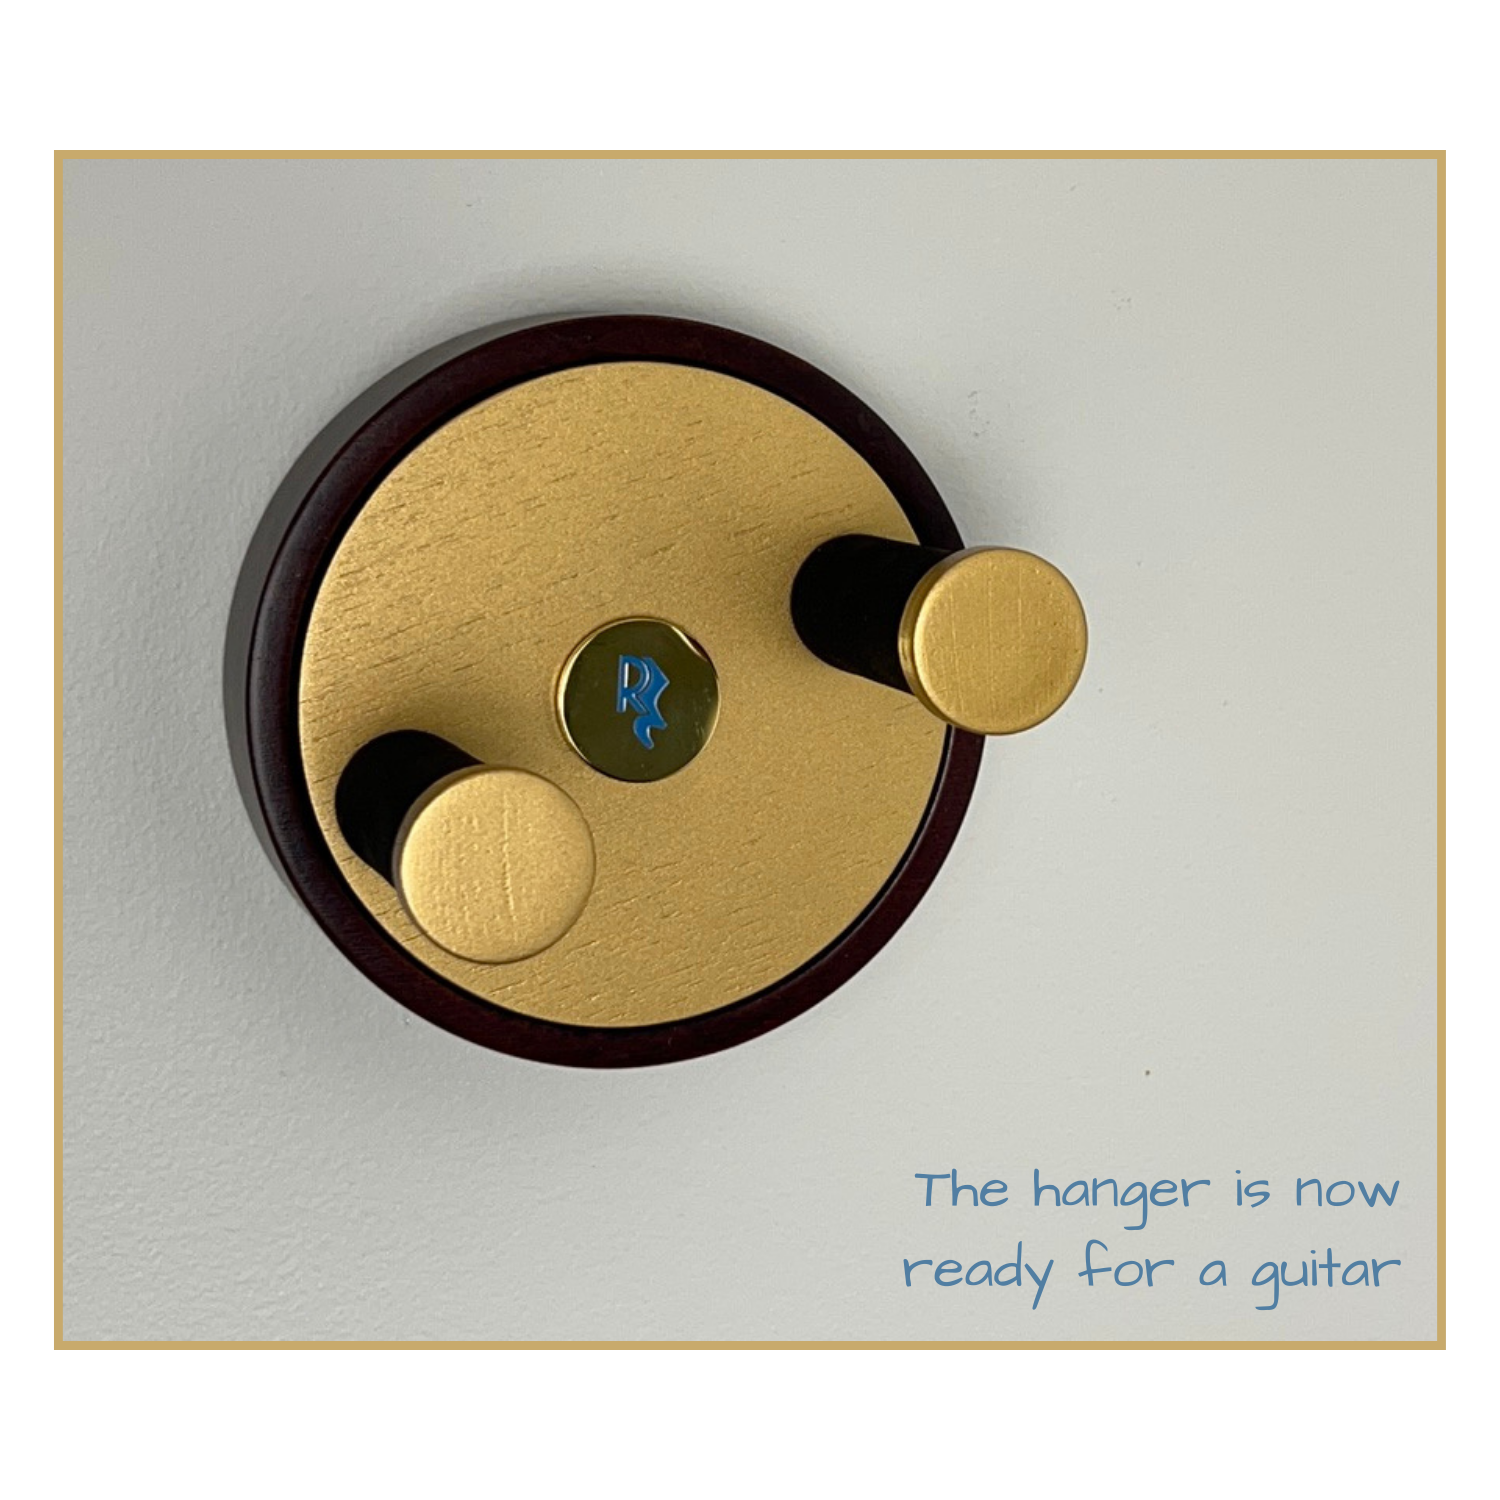

Step 20 - Installed!
The installation of out Mudenza, guitar wall hanger is complete.
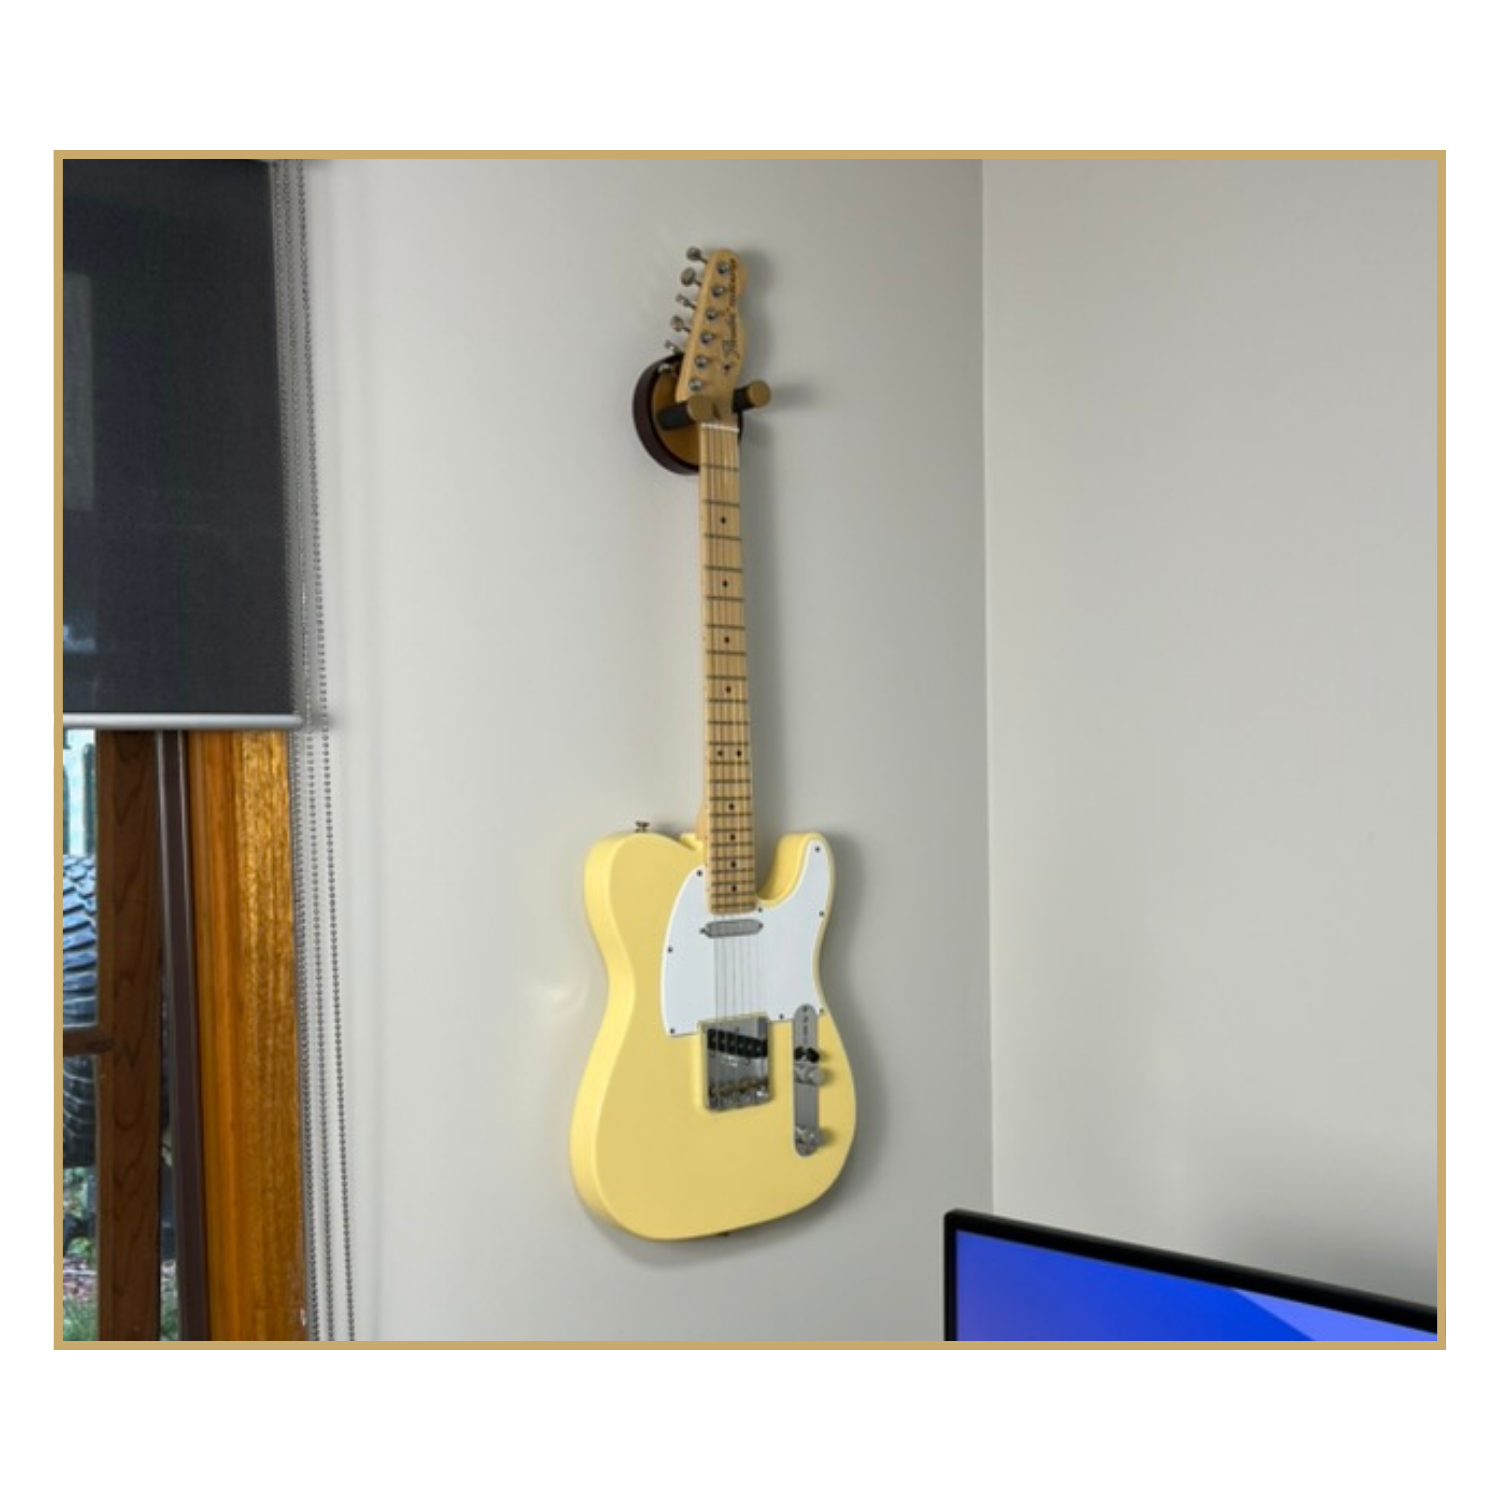

Step 21 - Stand Back
Hang your guitar, stand back and enjoy. Don't forget to use your guitar! 🎸
Still have Questions or Feedback?
Please for anything else, please reach out to us via the contact form and we’ll answer your questions as soon as we can.

